Featured Post

Go Galette Go! My heart will always Galette on…

5 Beautiful Galettes: Red Pear Galette, Peach Tej Patta Galette, Panchphoron Mango Chutney Galette, Cherry Clove Galette n Paneer Tomato B...

Tuesday, December 23, 2014

A Pampering Pasta Soup for the Home Home comfort

Gomiti Rigati Pasta  Soup with carrots, Green Beans, Tomatoes,Fresh Coriander n Parmesan cheese


I'm back from a fantastic journey! It took me to a new city, MUMBAI, it made me stand among-st the crowd of enthusiast food lovers from all across India, I met n made fantastic foody friends, there were food gossip in the air, a lot of laughter n the happiness of sharing, the feeling of togetherness n finding comfort among-st total strangers…all of that. This will explain my delay in the blog. To my readers :Dear Reader , my sincere apologies to you , in the last couple of weeks I could barely use the internet , so to make you smile I have this really good pasta soup, I wish you good health and may you read on.


Christmas is 2 days away, in fact it’s not away at all, I feel it looking around me n in the small cake bites I plunge in. Today I decided rather to tell you about this simple Pasta soup with green beans, onions, tomatoes, carrots, fresh coriander leaves , the pasta I used was gomiti rigati. When I tasted it a on certain morning about a month ago it stuck in my heart for some reason, it was simple, heart-warming, full of flavors and now that its winter I feel it is such a comfort on cold winter mornings or evenings, it can literally bring a smile to everyone you serve.


You know how it came into being! It was around 9.30 in the morning, I entered the kitchen wondering what to make for breakfast, I wanted to have something rather than oats that day, so I found green beans n parmesan cheese, I spotted the pasta in the table. and this dish came into being. The wonderful thing about this soup is the pasta gets done inside the soup, so no draining the pasta, the flavors in the pot gets mixed with each other, getting the flavors to new heights, it is nutritious n filling.


Today is the Birthday of my Blog J  A big hug to all of you n BIG HAPPY BIRTHDAY DEAR BLOG !


So now I will tell you about what all we need for re-creating this pasta soup.


For The Recipe:  We will need


Gomiti Rigati or any pasta you like- 150 gm
Carrot- 1 medium, peeled and  chopped into 1 inch slices
Onion – 1 medium, chopped
Green Beans-100 gms, chopped into  1 inch pieces
Garlic – 5 medium cloves, slightly smashed
Tomatoes- 1 medium, chopped
Fresh coriander leaves n stalks- 3 tbsp, chopped
Black Pepper- freshly grounded
Red chili powder- ¼ tsp
Nutmeg- 2  pinches, freshly grated
Sugar- a pinch
Parmesan cheese- 2 -3 tbsp
Butter- 1 ½   tbsp
Vegetable oil- 1 tbsp
Water/vegetable stock/chicken stock- 3-4 cups
Pink rock salt- a pinch
Salt


1. In a shallow frying pan add ½ tsp of butter n 4 tbsp of water n add the green bean slices, put the pan on low heat, cover it , give it about 5-7 minutes when the beans will be tender but still crunchy, stir the beans in between and if the water dries up add little more water, when the beans are a bit tender, take them off the pan with any juices with them.

2.  In a deep pan, heat the remaining butter with the vegetable oil, when it is moderately hot add the smashed garlic cloves, give them 30 secs then add the chopped carrots, onion, toss them in the pan. In a low heat give them 5 minutes, don’t let them  brown much, only slightly, we are sweating them, after 5 minutes add the chopped tomato and the chopped coriander stalks n 2 tbsp of leaves. Mix well n give them 2 minutes, add a pinch of sugar, mix, then add salt n a pinch of pink rock salt, mix well. Then add the red chili powder, sprinkle a little water , give it 30 secs, after that add the water or stock. Cover the pan  and keep the heat to low. When the water comes to simmer add the pasta and cover again, give it around 10 minutes, the pasta will be done in 10 minutes. For this recipe we are not looking for AL-Dante pasta i.e pasta with a bite, we want pasta to be soft.

3.  After 10-12 minutes when the pasta is soft,  grate fresh pepper into the soup,  add the green beans, add a little blob of butter or skip it, then grate the parmesan cheese into the soup, check for seasoning. Lastly grate a tiny amount of nutmeg and sprinkle the rest of the fresh coriander leaves. Put the flame off, give the pan 3 minutes of standing time. After that remove the pan  and serve in bowls with a little more grated parmesan n fresh coriander. And now you will see the magic of this soup. Lets smile n say Yummmm… together.  Bon Appetit.


Saturday, November 22, 2014

The Tower of the Beautiful Boondis

Meethe Boondi, Mishti Bonde, small fried balls of chickpea flour dipped in sugar syrup


First of all I will tell you what are ‘Boondis’- well basically they are a sweet snack, they are prepared from a mixture of Besan/Chickpea flour and water, then deep fried in oil, then dipped in a sugar syrup, so the result is numerous crispy tiny balls coated with sugar syrup or often they are also soft n coated with sugar syrup. Whether they are crispy or soft one thing is common about them, that are they are just delicious in both ways, there is something about the flavor of the besan, the flavor of the oil, the sugar syrup absorbed inside, the crunch and the softness that is addictive. We just wanna keep on munching at very short intervals. Ha-ha.


This is one of my sweet favorites right from childhood, I think first of all it is the appearance that attracts everybody to boondis, the numerous small yellow balls hold together at times by a light coating of sugar syrup or the shiny soft balls that is indeed tempting. When we taste after the visual bite there is a satisfying feeling, they are not very sweet, moderately sweet.  


When I was a kid my dad would sometimes bring boondis/bonde from the sweet shop on his way back home from office or market and my elder sister n I would kinda jump on them-mostly we used to eat them on their own or at times we would eat the boondis with Luchi/Puri, crispy puffed rice known as ‘Muri/Murmure/Mamra’ and at times with rotis. The boondis that my father used to bring from the shops were always soft n shiny and we will mix them with crispy muri, which was such a play of texture, the soft boondis and the crispy puffed rice…let me say yummm... Try the boondis with paratha and you will also lick your fingers.


Still to this day when my elder sister/didi visits us, often she goes to the sweet-shop and she comes back with packet of soft boondis, she loves it now equally if not even more! My mother she loves the old way when she combines them with the crispy puffed rice.


Making boondi is rather easy, it is not very hard at all, in fact there are some crucial steps which if not done properly will make it go wrong, here I will tell you about them, so let me say this again, making boondi is easy. First of all the mixture of the chickpea flour/besan with water has to be beaten well with a ladle or whisk, you have to beat the mixture for about 10 minutes totally in 2 stages. Secondly the mixture of the besan n water has to be light n not thick, if it is thick the boondis will tend to have a tail with them and they will be quite hard, so keep the batter light that easily pours from the ladle, so thin consistency. Thirdly the oil has to be moderately hot, when we will place a drop of batter in the oil it should come floating to the surface of the oil in about 5-7 seconds, if the oil is lower in heat them the boondis will absorb a lot of oil and they won’t come to the surface in that time, if the oil is too hot then immediate they will go brown and before you can take them out they will go dark brown, so moderate heat and low to medium flame. Keep a big slotted spoon at hand which is called ‘Jhanjhri’ in Hindi in hand, in fact keep 2, one to produce the drops of boondi and one to take them out of the oil.


So let’s get making them! Here is the simple recipe.

For The Recipe: You will need
For The Boondis:
Chickpea Flour/Besan- 2 cups
Water- about 3/4 cup
Salt- tiny pinch
Vegetable oil- 1 ½ tsp
Vegetable oil-4 cups for frying


For The Sugar Syrup:
Sugar- 2 cups
Water-1 -1 ½ cup

To serve: Fresh Pomegranate seeds


1. First of all in a bowl add the besan, half of the water and with a ladle mix the besan so that there are no lumps , if you add all of the water at once you will have a hard time finishing off the small lumps in the watery batter, so add little water while the batter is tight n make the batter go smooth in that condition , then add some more water, make it go smooth again, then some more do the same, add the pinch of salt, mix well. Now the consistency has to be thin pouring consistency, so the amount of water I have mentioned may vary.  When you drop the batter from a height it should fall freely, test the batter by pouring a ladle of batter on the slotted spoon and drops of the batter should fall from it freely at almost one second or half second intervals. If the batter is thick the boondi will be hard and they will tend to have an elongated part with them-the tail. So the batter will be on the thinner side, not thick. When the batter is at this consistency whisk the batter for about 5-6 minutes, then rest the batter for 10-15 minutes more.

2. Let’s make the sugar syrup, so in a pan or wok add the sugar n the water, on a low heat stir this until all the sugar melts, then increase the heat to medium and give it about 3-5 minutes, after 3 minutes check the syrup by placing a drop of syrup on plate and test it with your 2 fingers, and it should feel slightly sticky like honey. So after 3 -5 minutes if you find the syrup has gone a bit thick n has become like honey, put off the flame and remove it from the flame.

3. In meantime when the batter is resting, heat 4 cups of oil in a big, kinda shallow wok/kadai or pan, make sure that the wok or pan is not deep; we need more surface area so that we can pour a lot of boondis at one time. If the pan is deep n small then we will have to fry the boondis in many batches. So heat the oil on a medium flame till it is moderately hot, test by dropping a drop of the batter and it should come floating to the surface in 5-6 seconds and also see if the boondi is round in shape.

4. After 15 minutes add 1 ½ tsp of oil in the batter and whisk it in, whisk the batter again for 5-6 minutes well. This whisking is important. So now we are ready for making the boondis. Take the slotted spoon and pour a ladle full of batter on the slotted spoon and you will see that tiny drops are falling on the surface of the hot oil and moving away to the rim of the wok, take another ladle full of batter n do the same. Do it until the whole surface of the oil is almost filled with little drops of the batter. Give them a minute then with another slotted spoon move around the tiny balls and flip them lightly in the oil. When the balls start to go light brown n crispy take them off with the slotted spoon and place them in the sugar syrup.

5. Now we will make the next batch, so make sure the oil is not cold or too hot, then do the same as before to make the boondis, and after about 1 ½ to 2 minutes when they are light brown n crispy take them out and place them on the syrup. Keep the boondis in the syrup for about 10-15 minutes, then take them off on a plate and now you can munch on and share with your loved ones or hated ones just to make them love you! Combine them with fresh pomegranate seeds and see the magic of both of them together!  So please enjoy and keep the smile on. Bon Appetit!


Sunday, November 16, 2014

Til Ke Laddu/Tiler Nadu- A rolling laddu gathers no ants, gets picked up by hands

Sesame Seed Brittle sweet balls with caramelized Jaggery, Til Ke Laddu Gurr walen , Tiler Nadu Gurr diye


So just before Diwali in this year I made something sweet, these laddus made out of sesame seeds and jaggery, laddu is an Indian term which describes any sweet spherical in shape, a ball, so a laddu always refers to a ball shape. Now I love sesame seed laddu, they have a unique flavor, subtle, pleasant and heartwarming.  I have not posted anything in my blog for 2 weeks which is a long gap I fear and my readers must be disappointed with me so my apologies dear readers and trust me when I made these luscious laddus this October I thought of you all, I thought of telling you all as soon as I made them on that very day, I imagined all of your smiling faces at different corners of the world, the love for good food –this is what connects us. So here I am in mid-November telling you about it and just to make it up to you I have to give you something sweet to sweeten things between us, so here I gift to you the Sesame Seed Sweet Brittle Laddus. Have your big bite J


                               As a kid these laddus were a delicacy to me and my sister simple because these will appear during a certain month on the year, especially around the Durga Puja n Laxmi Puja. There are certain food that are associated with a certain event, religious or social which are made only during a certain period of a year and when that time is over so will disappear these foods like magic! My elder sister just loved these laddus like anything, I remember the expression of fascination and happiness on her face as she hold the laddus in her hand and shared it with me and then the moment when we bite into one, crunchy, chewy, sweet. Oh how satisfied was that look on her face after the bite and how we cherished those moments n the laddus. And all those laddus in childhood came from either sweet shops or from someone’s home during that puja. My mother never made these at home, rather she made coconut laddus. 


                                                   One thing that is important n memorable about a sesame laddu/Til ke laddu is the ‘Bite Experience’. When you bite into a sesame laddu often times it is hard which requires a bit of strength of your teeth and at times the laddus are relatively softer which give away under a slight pressure under your teeth. Now it all depends on the level to which the jaggery has been caramelized- if the jaggery is caramelized only slightly it will not hold the shape of the laddus, if the jaggery is taken to a very thick n dark stage it will be very hard when cold and this will create a real hard bite experience, when the stage is in between the laddus when cold they will be soft to hard creating a rather easy bite experience. Now a very hard til laddu will have a longer shelf life but we don’t need a longer shelf life for til ke laddu because they get finished so quickly!


                                                                                So it makes all the sense to make the sesame laddus bit softer, easy to bite. By the way did I tell you that some of the sesame laddus are so hard that if you throw them to someone it can seriously hurt them! Or in case you are playing cricket and lost the ball you can replace with a sesame laddu and it will be just fine! Hahah. But the laddus I made this year were a pleasant bite always, softer n happier.


           I have added a layer of flavor in the laddus, the beautiful flavor of the fennel seeds which are known as saunf or meeth saunf or mouri, goes so well with the flavor of the jaggery and the sesame seeds. The experience is so aromatic because of the presence of the fennel seeds. Now I will tell you the recipe so that you can make it in your kitchen.


For The Recipe: You will need
Sesame seeds- 250 gm
Jaggery/Gurr- 200 gm
Fennel seeds- 2 tsp
Salt- tiny pinch


1. First take a big wok or kadai or a big pan, it is easy to prepare this in a big wok rather in a small deep wok or pan, in a big wok it becomes easy to move around the mass of jaggery n sesame seeds. So take a big wok and add the sesame seeds and the jaggery and mix well with your hands until they are roughly distributed uniformly. Then put the heat on to medium flame, soon you will see that the jaggery has begun to melt under the heat. With a wooden spoon stir the mixture almost after every 30 seconds so that the jaggery never gets burned at the bottom of the wok. For this reason it is better to do it in a wok or pan with a thick base in which things don’t burn very easily.

2. Now after 5-8 minutes all the jaggery will melt completely, keep stirring every 30 seconds well and mix well everything, as the jaggery melts the whole mass will look more like a thick liquid, keep stirring and don’t move away from it for a minute, it burns quickly. However if it burns just a little bit its okay, don’t panic, it has happened with me to and it doesn't ruin the things until you have left for 2 whole minutes and it has burned quite a bit. So stay with it, don’t go anywhere, and don’t leave it alone for a minute.

3. Once the jaggery melts completely keep it on medium flame for 2-3 minutes, then put the flame to low and watch it n stir it every 30 seconds. At this time you will see the jaggery bubbling because it has melted, after about 5 minutes you will see the jaggery will thicken a bit but the bubbles will be slightly stronger in intensity and the mass will look a bit more liquid-ish in nature. As I said this will happen after 5 minutes once the jaggery has melted or roughly it will take  about 5 -8 minutes to get there depending on the temperature. Increase the heat to medium high at times stirring continuously for duration of 1 minute and then reduce it to low flame again. Just don’t keep the mass on high flame for more than a minute and if you are stirring very often you have very less chances of burning anything.

4. So 5-8 minutes after the jaggery has melted, the mass is bubbling and looks more liquid-ish than before, this is the stage when another transformation will take place, very soon the bubbles will reduce the whole mass of jaggery n sesame seeds will begin to thicken. So on a low or low to medium flame stir the mixture and watch it, after about 5-7 minutes the whole mass will thicken a bit more than before, it becomes a little difficult to stir it since it is thickening, at this stage add the fennel seeds and stir uniformly, add the tiny pinch of salt, stir and watch it. At this point take a teaspoon of the mass on a plate and when it cools slightly try to give it a round shape with your hands, see if you can do that easily or when you try to give it a round shape does it hold that shape or it feels quite soft when you try to give it a shape. Don’t forget to stir in-between, mostly when you will try to give it shape it will be a bit too soft to hold shape or just begin to hold shape, if it is too soft to hold shape give it 1 minute and try to do it again, if not there give it another minute until it comes to the stage when it just begins to hold shape.

5. Keep the heat always very low at this stage, so we will take little portions of the mass and test it like this until it just begins to hold shape, when the mass is at this stage we can still make laddus but they will be very soft, so we will give this mixture some more time-about 2-3 more minutes. So we will check again after 2 more minutes and see if now we can give it shape comfortably and it holds the shape or not. So we will give this another 1-2 minutes and when tested to give shape it will hold the shape properly. At this put the flame off and take the off the flame and pour the whole hot mass very carefully on big flat iron or steel plate.

6. Now it is time to face the heat! Take a bowl of water and wet your hands n pick up about a teaspoon of the hot mixture carefully in your hand and roll it between your palms to give it a spherical ball shape. The water is to protect your hand, after one has been done wet your hands again pick up another teaspoon of the mixture and make a ball out of it. it is advisable to work with one more person with you or 2 more persons with you doing the same, because as the mixture cools down slowly it becomes more hard so it becomes a little difficult when it is almost at room temperature, so having one more person with you will help making the laddus quickly before it gets to room temperature and also it will make the work faster. In case you are working alone and the mixture has got cold and you can’t make the laddus anymore, return the mixture in the wok and warm it slightly and pour it back in n start making the laddus again. But I will advise you to work with someone.

7. So now the laddus are done, try it, bite into it, it is hard but still breaks off easily under little pressure. As for cleaning the wok I will tell you the easiest way , pour some water in the wok, heat it, as the water heats up a bit with the wooden spoon make the hot water go all over the surface of the wok where it has got sticky and it will melt in no time. This is the easiest way to clean the wok with hot water, it is just jaggery that has caramelized and hardened when cold. So now the laddus are waiting, share the laddus with your loved ones and have the bite experience. Bon Appetit.


Tuesday, October 21, 2014

For The Love of Durga Puja – An Indian Thali

A Vegetarian Thali dedicated for the 6thday Of the Durga Puja in Bengal, a journey across the taste buds


Durga Puja is a huge affair in India, especially in the region of Bengal, a religious festival at its core; it celebrates the ‘Devi Shakti’, the celebration of the divine goddess power winning over the power of the demons.  It is a six day festival, starting from the sixth day the days of the names are respectively sasthi, maha-saptami, maha-astami, maha-navami n vijaya-dashami. In some parts of India, Navratri is being celebrated at the same time and the tenth day of Navratri is the day of the Dashera/ Vijayadasami. This puja is widely celebrated across the states of Assam, Bihar, Jharkhand, Orissa, Manipur, Tripura and West Bengal.


                It is a fantastic festival, the biggest Hindu Festival in all these states and as years pass by the celebration only gets bigger n more colorful. Though it is a religious festival, everything about life comes to life during this time-food, fashion, music. It is the food scene which gets interesting here-I can actually divide the whole range of food during the festival in 2 categories, one will be the food for the Puja and another will be food not intended for the puja. The food that is offered during the 6 days to the goddess Durga is mostly vegetarian, though on certain day fish is offered to her. All the food that is offered to her is termed as ‘Bhog’, which is food offered for the divine. Interestingly most of the vegetarian food is cooked without onion n garlic. Bhog is cooked in enormous amounts at times, which is offered to the goddess and then distributed to the people worshiping her and the food is considered blessed.


                                          So on the 6th day of the puja this year I went to my kitchen and cooked up 6 dishes and 1 salad which made up my puja thali. ‘Thali’ is the word meaning a whole meal served in one big plate, the plate can consist of dishes from 6 to 16! However often several small bowls of food are served alongside one big plate and all the savory n sweet comes together in the package. So there I was with my first ever puja thali, in fact my plan was to cook a new thali for each day and to present it with all of you, but my computer did crash just then! May be it was a divine plan! 


                                                                         For this thali I made 6 dishes, one CHOLAR DAL/CHANA DAHL, which is a lentil dish, a dish of green beans n potatoes pan-fried with spices, deep-fried flat bread called LUCHI,  SAFFRON PULAO/PILAF of Govindobhog rice, VERMECELLI PUDDING /SEWAI PAYESH, PLASTIC CHUTNEY of green papaya and a simple salad of cucumber n tomatoes and fresh strips of coconut.

The ‘CHOLAR DAL’/ ‘Chana Dahl’ is a savory lentil dish, flavored with coconut n hing (asafetida) n green chilies the taste is balance of salty n sweet. Very subtly spiced with turmeric, its color is light bright yellow and it is fantastic paired with the deep-fried flat bread ‘LUCHI’ or ‘POORI’.


‘LUCHI’ is made from plain flour, they puff up as they are being deep fried, lightly crisp on the outside n soft inside, the proud moment of a LUCHI is when it has puffed up with a lot of air inside him!


                                                                 The ‘Green Beans with Potato’ is spiced with ginger, cumin seeds, red chili powder, turmeric, coriander. The green beans still have a little crunch in them while the potato is soft n has absorbed all the flavors together. This dish is good paired with the saffron pulao of ‘GovindoBhog Rice’ which I served.


                                                                             The ‘ GovindoBhog Pulao with Saffron’ is made using the ‘GovindoBhog’ rice , the rice grains are small in size and they are very aromatic, they impart a beautiful flavor both to sweet n savory equally, so much so, they are often used in cooking the food for the gods-‘BHOG’ and often at home where something special is being cooked. The pulao is flavored with saffron, cloves, green cardamom, a touch of turmeric and raisins are added to them.


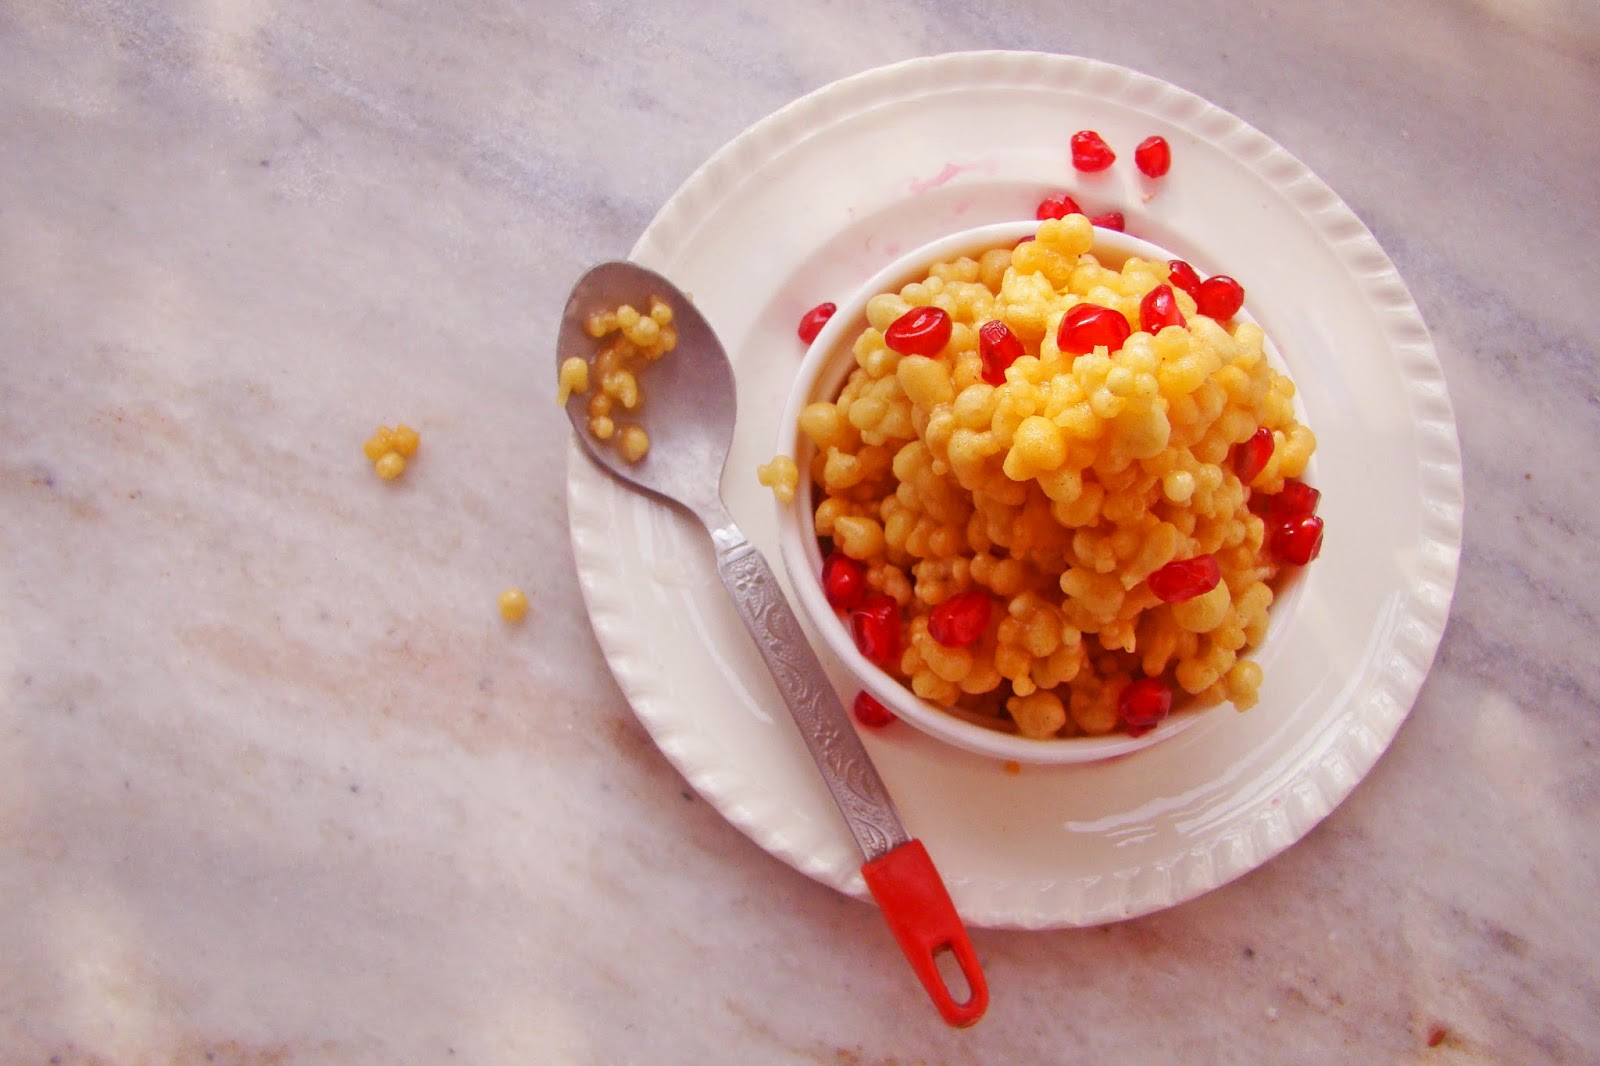
                                           The ‘Simui/Sewai/Vermicelli pudding’ is a sweet dish, made from thin vermicelli strands with milk, Ghee, cashew nuts, raisins, Indian bay leaf,  it gives fulfilling sweet feeling, I like it cold.


The ‘Plastic Chutney’ is sweet chutney of green raw papaya, light n fresh in its taste. The thin papaya slices becomes translucent being cooked in sugar syrup, so they look like tiny plastic chips. The chutney has the flavor of the papaya, fennel seeds, mustard seeds, lime juice, sugar, raisins and it also has the crunch of the almonds in between. Fantastic stuff it is.


                                                                           So in this post I guess there will be 6 recipes, in fact 5 because you can read about plastic chutney in my previous post. So hold on dear reader because simply it’s a lot of cooking.


For The Recipes:


For the Sewai/Vermicelli pudding
Vermicelli- 1 cup thin or thick
Ghee-2 tbsp
Sugar- 3-4 tbsp
Cashew Nuts- 7, chopped
Raisins/Kismis- 2 tbsp        
Milk- 2 cups
Indian Bay leaf- 1
Green cardamom pod-1


1. In a flat pan, melt 1 tbsp of ghee in a medium heat, when the ghee melts add the vermicelli and mix well, in a medium flame toss the vermicelli around for a minute, then lower the heat give it around 5-8 minutes, toss them every 1 minute and you will see they will more reddish in color after 5 minutes, once you have the reddish color developing, take it off the pan to a plate.

2. In the same pan add another tbsp of ghee n add the chopped cashew nuts , the bay leaf, slightly crushed cardamom pod,  once the cashew nuts start to get light brown, add the raisins, then add the milk, and keep the flame to low. Let the milk come a slight simmer,  add the sugar, first add 3 tbsp, taste then add if you need, let the milk simmer in a low flame for about 2 minutes, then add the fried vermicelli and mix well. The vermicelli will absorb all the milk when it will be cooked n it will take about 5-6 minutes, add a tiny pinch of salt to the milk in between, and if you want you can add a little more milk because once it will be cooled it will absorb more milk. So when the vermicelli has got tender and has absorbed most of the milk take it off in a bowl and let it cool.


For the Cholar Dal/Chana Dahl
Bengal Gram dal/cholar dal/chana dahl- 1 cup, wash n soap in water for 30 minutes
Fresh coconut- 3 tbsp, chopped in 1 inch cubes
Fresh strips of coconut- a couple to serve
Green chili-2, slit
Turmeric- ½ tsp
Water- 4 cups
Sugar-1 – 1 ½ tbsp
Salt
Hing/asafetida- ½ tsp
Vegetable oil- 2tbsp


1. First we will put the soaked dal in a pressure cooker, take a green cardamom and crush it slightly, then in a pressure cooker add the soaked dal, 3 ½ cup of water, ½ tsp salt, crushed cardamom, ¼ tsp turmeric powder and put it in high flame, as the water just comes to a simmer close the pressure cooker. On a high flame reach one whistle then lower the flame to low and give it 8 minutes, then increase flame to high until one whistle. After that take it off the heat, let the pressure be normal as it cools down.

2. In a wok take 2 tbsp of vegetable oil like sunflower or soybean, let the oil be moderately hot, then add the chopped fresh coconuts and reduce the flame, toss the coconut pieces now n then, add the slit green chili in between, after about 5 minutes the coconut will start to get some light brown color, once they are light brown in color, add the hing powder, then the rest of the turmeric, then add 1 tsp of water, we are adding the water so that the turmeric powder doesn’t burn , give it all a minute, then open the pressure cooker and the dal should have softened inside, check by pressing with a spoon or in-between your fingers if the dal can be smashed, add the dal to the wok now. Taste and adjust the salt, add the sugar and taste. Simmer the dal for 4 minutes on low heat, then stop the flame and give it 2 minutes of standing time, then pour it in a bowl. Add some fresh strips of coconut with the dal, it’s just lovely.


For the Luchi
Plain flour- 200 gms
Water- around 120 ml
Salt – a pinch
Oil -3 cups for deep frying


1. Mix the flour and the salt and 1 tbsp of oil together until combined, then make a well in the center of the flour and add half of the water, start working from around the water mixing it with the flour, then add the water gradually as you keep doing it, once 100 ml of water has been added, add the water gradually, once the dough comes together comfortably it is there. The dough should not be tight and a little to the soft side only, start kneading the dough for about 2-3 minutes, as the dough just becomes smooth in texture we are done, we don’t want to knead the dough more than that or we will develop the gluten too much which we don’t want, so 2-3minutes of kneading will do. Then roll the dough and give it the shape of a log of 2 inches diameter, then tear off small balls from the log, like about 1 tbsp of dough each ball and roll the balls slightly to make them smooth, then sprinkle some oil over them, lightly coat in that oil and rest it for 30 minutes by covering it.

2. After 30 minutes take out your rolling pin and a bit of oil for rolling the Luchis. Take a ball of dough and coat it with a little oil, then put it on the board, press it lightly n with a light hand roll it to a circle of 4 inches in diameter, take it off, start with a new ball, coat it in oil and do the same. After all the balls have been rolled it is time to deep-fry them. in a deep wok heat the 2-3 cups of oil, once the oil is quite hot test by submerging a one disc of dough, it should start to bubble, if it does the oil is ready, add one luchi carefully n slowly into the oil, don’t drop it into the oil from a height, the oil will splat, slide it into the oil being close to the oil surface. as it goes into the oil it will sink for some seconds then it will start to float up, as it starts to float up, press that surface lightly with a slotted spoon, give this side 1 minute and turn it over, you will see this side has started to go light brown, other side will take less than a minute, the luchi should be light brown on both sides. Likewise fry all the remaining luchis.


For The Green bean n Potato Sabzi
Green beans-100 gm, chopped in 1 inch diagonal pieces
Potato-2 medium, chopped in 2 inch sticks
Tomato -1 medium chopped
Cumin seeds-1 tsp
Turmeric- 1/4th tsp
Butter – 1 tsp
Vegetable oil – 2 tbsp
Coriander pwder-1 tsp
Chili powder -1/2 tsp
Sugar- a pinch
Ginger- grated ½ tsp


1. In a frying pan on a low heat add the butter, 3 tbsp of water, then add the green beans, cover the pan on a low heat, the water will soon come to a simmer n start to steam the beans and the butter will emulsify with that water, give It about 7 minutes, toss the beans once in between, add a little more water if the water dries out completely. After 7-8 minutes the beans will be quite tender, still green, at this time take them off the heat and keep the beans in a bowl.

2. In the same pan heat 2 tbsp of oil, to the hot oil add the cumin seeds, as the seeds begins to sputter add the potato, increase the heat to high and toss the potatoes for 1 minute. After that reduce the flame and give the potatoes 5-7 minutes, they will go brown on that side, then toss them and give the other side about the same time, as the potato go soft add the grated ginger , mix well. Give them 1 minute, then add the tomatoes and also add the beans, now add a pinch of sugar, then add the turmeric , coriander powder, chili powder and add 1 tsp of water in the pan, mix well, give them 30 seconds then add the salt, taste n adjust. Then take it off the heat.


For The GovindoBhog Rice Pulao
GovindoBhog Rice- 1 cup (Basmati rice or any white rice if you don’t have GovindoBhog)
Water-2 cups
Clove-4
Green cardamom-2
Ghee-1 ½ tbsp
Raisin/Kismis- 2 tbsp
Turmeric – small pinch
Saffron strands- 1 big pinch
Sugar- 1-2 tbsp
Salt


1. Begin by washing the rice in water till the water almost becomes cleans, then soak in water for 30 minutes, after 20 minutes drain the water n leave it aside.

2. After 30 minutes take a deep pan or wok on medium heat, add the ghee, when the ghee is hot, add the crushed cardamom pods, the cloves. Give them 30 seconds on low heat, then add the kismis, toss them around for a minute, then add the rice and sprinkle the turmeric powder over the rice, put the heat to medium and toss the rice in the wok for 1 minute, then reduce heat to low and give the rice 5-6 minutes on low heat, toss them at every minute, after 6 minutes add the saffron strands, mix well, then add the water, salt to taste n sugar. Taste to see if the salt is okay, the rice will absorb the salt so add a little more salt than needed, it will balance out. Put the heat to high now, let it come a simmer then cover the pan with a heavy lid, reduce the flame to low and give it around 12-15 minutes. After 12 minutes open the lid and with a fork check if there is any water in the bottom of the rice, if no its just done, if yes cover it again and give it 3 minutes, once the water is absent put the flame off, give it 2 minutes of standing time and then with a fork toss the rice lightly. And that’s it. Pulao is ready to serve.


For the cucumber n Tomato Salad
Cucumer-1, washed n thinly sliced
Tomato- 1 medium, thinly sliced
Lime- 1 wedge


1. Simply toss the cucumber n tomato slices in the lime juice, add a pinch of salt. That’s it!


For the recipe of the Plastic chutney it is already in my previous post, here is the linkhttp://thetaleofasaltedsoul.blogspot.in/2014/05/plastic-chutney.html


So there it is-The Fantastic Thali for Durga Puja especially for the 6th day, sasthi. In fact you can cook it on any puja occasion and it will be delight to eat. Serve it to your loved ones and see their faces light up, which is fantastic thing you will agree. So come on in, the Thali is waiting. Bon Appetit.