Featured Post

Go Galette Go! My heart will always Galette on…

5 Beautiful Galettes: Red Pear Galette, Peach Tej Patta Galette, Panchphoron Mango Chutney Galette, Cherry Clove Galette n Paneer Tomato B...

Showing posts with label Indian. Show all posts

Wednesday, December 16, 2015

Phenomenal Pati-Saptas, a dream folded in three


Amazing Rice flour pancakes from the heart of Bengal, stuffed with kheer n Aam-satto/Aam-papad


When it comes to pati-spatas , everything becomes clear water, there is no conflict or confusion, it is delicious like a dream, soft like love n slightly crisp at times like reality itself. I have loved it all through my childhood, love it dearly now and as I make them I get dissolved in their being. We can call them sweet pancakes generally but trust me they are so much more than that.


The batter is made from rice flour mainly, sometimes semolina and flour is added to the rice flour and milk is added to get to the desired thin consistency. When it comes to the stuffing we have very beautiful choices, one is freshly grated coconut cooked with date jaggery which is the supremely delicious ‘Nalen Khejur Gurr’ or sugarcane jaggery which has its earthy sweet magic, another is kheer which is milk simmered until it almost solidifies n then mixed with a little sugar. In my version I have created a new flavor for the stuffing and it was inspired by a gift- some days ago my friend gave me a beautiful gift-home-made dry mango cakes-‘AAM-SATTO’, a box full of them. Aam-satto is made from fresh mango pulp mixed with water and a touch of spices, then the batter is spread thinly over plates and sun-dried until the water evaporates and the rest settles as a thick layer of cake-the flavor intensifies and changes under the sun light and we get aam-satto.


Back home I softened the aam-satto with milk, then mixed them with kheer until a beautiful rich mixture was obtained- sweet n with a slight touch of tang and filled with that mango flavor. When I stuffed them inside the soft pati-sapta they made me smile, they taste exclusively delish and my friend found them refreshingly different delicious.


Winter is a good time for pati-sapta, in fact every time is a good time for them but in the winter it gets special for a number of reasons, one is it feels great to bite into the warm pati-saptas in a cold afternoon, second in the winter the majestic nalen gurr which is a type of jaggery made from dates, becomes available and that takes everything to a whole different level.


Pati-sapta is a pithe, pithe is a term used for deserts made from mainly rice-flour or a combination of rice-flour n flour or semolina made during a certain season or festivals in Bengal.


So now since I cant wait any more for the recipe, here you go.


For The Recipe: you will need

For the Pati-Sapta

Rice-flour- 2 cups
Plain flour- ½ cup approximately
Semolina- ¼ cup approximately
Milk (full fat/skimmed)- 500 ml approximately
Salt- a pinch
Sugar- 2 tbsp
Vegetable oil/ghee- ½ cup


For the Kheer

Milk (full-fat)- 1 litre
Sugar – about 2 tbsp


For the Aam-Satto stuffing
Aam-satto/dry mango cake/aam-papad- 150 gm
Milk- a little to soak them
Kheer-Half the quantity of kheer made above


  1. Begin by adding the rice flour to the milk at room temperature, the milk should not be cold, whisk in the rice flour with a wooden spatula or wire whisk until the batter is smooth, then add the semolina and whisk until smooth, then add the flour n whisk until the batter is smooth. The consistency of the batter should be thin n flow-y, like if you pour the batter from a ladle on a pan , you should be able to spread the batter relatively easily over the surface of the pan. If the batter is not thin with the given measurement above add some more milk to achieve that consistency, then add a pinch of salt to it, mix well, now let the batter rest for about 30 minutes.
  2. Making the kheer is a complete new recipe, for that take full-fat milk in a wok/kadai with a large surface area and let the milk come to a boil, then reduce the heat to lowest and keep simmering until the milk reduces to a solid mass where all the water component from it has evaporated, this will take about 30 minutes. Keep scratching the sides every 4 minutes and incorporate that into the milk as it is getting done, don't leave the milk and go away when this is happening, if you are not using a heavy bottomed wok the milk can burn at the bottom and ruin all your effort, so if you can, use a heavy bottomed wok and stay near the milk and stir it well every 3 minutes. When the milk has been reduced to a solid mass almost, stir continuously until it becomes a solid mass, then add the sugar and let it melt completely, then remove it from the heat onto a plate, the kheer should be sweet but not too sweet.
  3. For the aam-satto kheer, soak them in warm milk for half an hour until they soften, then smash them with a fork until uniformly mixed, after that add half of the kheer n a couple of teaspoon of milk to make a spreadable consistency mixture. When that is done, you have to do the same with the kheer, if the kheer is very solid , add some milk and lighten it up.
  4. Time to make the pati-sapta finally, so take a flat frying pan or chatu or pancake pan, keep it on high heat and let it get hot, then take any flavorless vegetable oil like soya bean oil or ghee, smear it over the surface of the pan, pour 1 tbsp of oil and heat it in the pan then pour it over the batter n mix it well. Now make the flame go to minimum, smear the pan again with ghee or oil and take a ladle full of the batter and lift up the pan in one hand and pour the batter on the pan, then spread the batter in a round form, you can do it with a spatula too, just work with a light hand, push the batter lightly to create a round shape, then increase the heat the medium and give it about 1 minute, with a spoon lift the pancake slightly to see if the surface has caramelized, if not give it some more time, then take and place one tbsp of aam-satto kheer mixture and spread it in the middle of the pancake , then fold the pan cake in three parts, then take it off the pan.
  5. So now smear the surface of the pan again with ghee or oil and lift the pan, mix the batter well and pour a ladle full of batter on the pan and do like before. Keep the initial temperature of the pan low so that when you pour the batter it doesn't settle immediately in the pan, when the initial temperature is low you have time to spread the batter easily either by rotating the pan or by gentle spreading the batter with the spatula, once the batter is spread increase the temperature to medium and let the caramelize, then fold it in three.
  6. Similarly make all the pati-sapta, fill them with aam-satto kheer and kheer. And then we are done.

 
So here we are, we have successfully made all the pati-saptas and I am sure you have tasted them already while you were still making them, that's what I do all the time, now tell me, don't they just taste out-of-this world, soft succulent inside, crispy outside and so soft, so now share it with your loved ones, eat them warm or cold, they are delicious in every stage, so now you have one more great recipe in your collection. So you know what! Bon Appetit.

Sunday, November 16, 2014

Til Ke Laddu/Tiler Nadu- A rolling laddu gathers no ants, gets picked up by hands

Sesame Seed Brittle sweet balls with caramelized Jaggery, Til Ke Laddu Gurr walen , Tiler Nadu Gurr diye


So just before Diwali in this year I made something sweet, these laddus made out of sesame seeds and jaggery, laddu is an Indian term which describes any sweet spherical in shape, a ball, so a laddu always refers to a ball shape. Now I love sesame seed laddu, they have a unique flavor, subtle, pleasant and heartwarming.  I have not posted anything in my blog for 2 weeks which is a long gap I fear and my readers must be disappointed with me so my apologies dear readers and trust me when I made these luscious laddus this October I thought of you all, I thought of telling you all as soon as I made them on that very day, I imagined all of your smiling faces at different corners of the world, the love for good food –this is what connects us. So here I am in mid-November telling you about it and just to make it up to you I have to give you something sweet to sweeten things between us, so here I gift to you the Sesame Seed Sweet Brittle Laddus. Have your big bite J


                               As a kid these laddus were a delicacy to me and my sister simple because these will appear during a certain month on the year, especially around the Durga Puja n Laxmi Puja. There are certain food that are associated with a certain event, religious or social which are made only during a certain period of a year and when that time is over so will disappear these foods like magic! My elder sister just loved these laddus like anything, I remember the expression of fascination and happiness on her face as she hold the laddus in her hand and shared it with me and then the moment when we bite into one, crunchy, chewy, sweet. Oh how satisfied was that look on her face after the bite and how we cherished those moments n the laddus. And all those laddus in childhood came from either sweet shops or from someone’s home during that puja. My mother never made these at home, rather she made coconut laddus. 


                                                   One thing that is important n memorable about a sesame laddu/Til ke laddu is the ‘Bite Experience’. When you bite into a sesame laddu often times it is hard which requires a bit of strength of your teeth and at times the laddus are relatively softer which give away under a slight pressure under your teeth. Now it all depends on the level to which the jaggery has been caramelized- if the jaggery is caramelized only slightly it will not hold the shape of the laddus, if the jaggery is taken to a very thick n dark stage it will be very hard when cold and this will create a real hard bite experience, when the stage is in between the laddus when cold they will be soft to hard creating a rather easy bite experience. Now a very hard til laddu will have a longer shelf life but we don’t need a longer shelf life for til ke laddu because they get finished so quickly!


                                                                                So it makes all the sense to make the sesame laddus bit softer, easy to bite. By the way did I tell you that some of the sesame laddus are so hard that if you throw them to someone it can seriously hurt them! Or in case you are playing cricket and lost the ball you can replace with a sesame laddu and it will be just fine! Hahah. But the laddus I made this year were a pleasant bite always, softer n happier.


           I have added a layer of flavor in the laddus, the beautiful flavor of the fennel seeds which are known as saunf or meeth saunf or mouri, goes so well with the flavor of the jaggery and the sesame seeds. The experience is so aromatic because of the presence of the fennel seeds. Now I will tell you the recipe so that you can make it in your kitchen.


For The Recipe: You will need
Sesame seeds- 250 gm
Jaggery/Gurr- 200 gm
Fennel seeds- 2 tsp
Salt- tiny pinch


1. First take a big wok or kadai or a big pan, it is easy to prepare this in a big wok rather in a small deep wok or pan, in a big wok it becomes easy to move around the mass of jaggery n sesame seeds. So take a big wok and add the sesame seeds and the jaggery and mix well with your hands until they are roughly distributed uniformly. Then put the heat on to medium flame, soon you will see that the jaggery has begun to melt under the heat. With a wooden spoon stir the mixture almost after every 30 seconds so that the jaggery never gets burned at the bottom of the wok. For this reason it is better to do it in a wok or pan with a thick base in which things don’t burn very easily.

2. Now after 5-8 minutes all the jaggery will melt completely, keep stirring every 30 seconds well and mix well everything, as the jaggery melts the whole mass will look more like a thick liquid, keep stirring and don’t move away from it for a minute, it burns quickly. However if it burns just a little bit its okay, don’t panic, it has happened with me to and it doesn't ruin the things until you have left for 2 whole minutes and it has burned quite a bit. So stay with it, don’t go anywhere, and don’t leave it alone for a minute.

3. Once the jaggery melts completely keep it on medium flame for 2-3 minutes, then put the flame to low and watch it n stir it every 30 seconds. At this time you will see the jaggery bubbling because it has melted, after about 5 minutes you will see the jaggery will thicken a bit but the bubbles will be slightly stronger in intensity and the mass will look a bit more liquid-ish in nature. As I said this will happen after 5 minutes once the jaggery has melted or roughly it will take  about 5 -8 minutes to get there depending on the temperature. Increase the heat to medium high at times stirring continuously for duration of 1 minute and then reduce it to low flame again. Just don’t keep the mass on high flame for more than a minute and if you are stirring very often you have very less chances of burning anything.

4. So 5-8 minutes after the jaggery has melted, the mass is bubbling and looks more liquid-ish than before, this is the stage when another transformation will take place, very soon the bubbles will reduce the whole mass of jaggery n sesame seeds will begin to thicken. So on a low or low to medium flame stir the mixture and watch it, after about 5-7 minutes the whole mass will thicken a bit more than before, it becomes a little difficult to stir it since it is thickening, at this stage add the fennel seeds and stir uniformly, add the tiny pinch of salt, stir and watch it. At this point take a teaspoon of the mass on a plate and when it cools slightly try to give it a round shape with your hands, see if you can do that easily or when you try to give it a round shape does it hold that shape or it feels quite soft when you try to give it a shape. Don’t forget to stir in-between, mostly when you will try to give it shape it will be a bit too soft to hold shape or just begin to hold shape, if it is too soft to hold shape give it 1 minute and try to do it again, if not there give it another minute until it comes to the stage when it just begins to hold shape.

5. Keep the heat always very low at this stage, so we will take little portions of the mass and test it like this until it just begins to hold shape, when the mass is at this stage we can still make laddus but they will be very soft, so we will give this mixture some more time-about 2-3 more minutes. So we will check again after 2 more minutes and see if now we can give it shape comfortably and it holds the shape or not. So we will give this another 1-2 minutes and when tested to give shape it will hold the shape properly. At this put the flame off and take the off the flame and pour the whole hot mass very carefully on big flat iron or steel plate.

6. Now it is time to face the heat! Take a bowl of water and wet your hands n pick up about a teaspoon of the hot mixture carefully in your hand and roll it between your palms to give it a spherical ball shape. The water is to protect your hand, after one has been done wet your hands again pick up another teaspoon of the mixture and make a ball out of it. it is advisable to work with one more person with you or 2 more persons with you doing the same, because as the mixture cools down slowly it becomes more hard so it becomes a little difficult when it is almost at room temperature, so having one more person with you will help making the laddus quickly before it gets to room temperature and also it will make the work faster. In case you are working alone and the mixture has got cold and you can’t make the laddus anymore, return the mixture in the wok and warm it slightly and pour it back in n start making the laddus again. But I will advise you to work with someone.

7. So now the laddus are done, try it, bite into it, it is hard but still breaks off easily under little pressure. As for cleaning the wok I will tell you the easiest way , pour some water in the wok, heat it, as the water heats up a bit with the wooden spoon make the hot water go all over the surface of the wok where it has got sticky and it will melt in no time. This is the easiest way to clean the wok with hot water, it is just jaggery that has caramelized and hardened when cold. So now the laddus are waiting, share the laddus with your loved ones and have the bite experience. Bon Appetit.


Friday, May 2, 2014

For Pabda

From the heart of mustard to the hands of a green chilly 


                                    For handling this fish you need delicacy or you will break her heart, her flesh and then her bones and you will have in hand fish gravy filled with broken hearts n bones. Even if that happens that doesn’t mean disaster for the taste will still be the same, only the texture will be different. So how come such a delicate fish be safe with hot chilies n pungent mustard, how come the flavor of the delicate fish make friends with fiery green chilies and hot yellow mustard?-the answer is unknown.


                                                                              As you are looking at the pictures of this delicate fish you may or may not have noticed something, that thing which makes it different from most fishes- that this fish doesn’t have any fish scales. With the absence of the fish scales it becomes an easy job for even a novice to handle this but then please be delicate with her, being a bull in the china shop will not help. This fish is soft n delicate in terms of  when you try to fry this fish it tends to break apart easily because of the softness of her flesh. Now scientifically this fish is known as Ompok Pabo, while in English we will know the fish as Pabo catfish or Pabda catfish.


                                                                                                                                         In terms of the flavor it has a subtle flavor which becomes fragrant when cooked and naturally it has slightly as if salty flavor, so going by that the most popular preparation of this fish in the regions of Bengal; tends to be salty in its basic taste spectrum. Some very traditional and popular preparations are ”Pabda  Macher Jhal”, which translated will mean the fish prepared in a gravy flavored with mustard paste and green chili paste , the oil being mustard oil, the other will be “Pabda Macher Jhol” which is the fish being stewed with a much lighter gravy infused with the flavors of cumin or nigella seeds or mustard seeds and tomatoes, onions, ginger or garlic of both at times and fresh coriander leaves. Now traditionally both of these fish preparations are eaten with white rice, it can be white basmati rice or the par-boiled rice “siddha” or sun dried rice “Aatap”.


                                                                                                                                                    Now for this recipe I am going parallel with the traditional recipe, the crucial part comes when frying the fish where too much handling the fish in the pan will make it go in pieces plus if the pan is not properly heated, if the oil is not hot or the fish is cold…anyone of this can lead to it. But then don’t panic at all if this happens, you will still be able to enjoy the wonderful flavors of this recipe, and if somehow the fishes are intact in one piece…yahoo…it is a good feeling. So I will tell you some stuffs that might help you…if the fish you are using are fresh which means that they are not frozen, then chances are high that your fish will not break into pieces easily, if the fish has been frozen, bring it to room temperature before it hits the pan, for both the cases dry them  before they go into the pan, as for the pan, first heat the pan without the oil until the pan is fairly heated, then add the oil and wait for the oil to be pretty hot, also before adding the fishes in the oil in the pan we can coat the fishes with a little oil, though it Is not necessary. Anyways I will tell you about the recipe now. I really hope you enjoy making and eating this fish in gravy. Bon appétit!


                                                                                                                          Oh I know I am writing after almost a month which is a delay. Did you miss me?


          For the Recipe:

6 medium size Pabda fish
1 ½ -2 tbsp mustard seed paste
1 tsp of whole mustard seed
1 small clove of garlic, crushed to a paste
1 green chili crushed into a paste
1 tsp of turmeric powder
½-1 tsp of red chili powder
1 tsp of Worcestershire sauce
1½ tbsp of soy sauce
2 tbsp of chopped fresh coriander leaves
1 or 2 fresh green chilies slit length ways
½ tsp of coriander powder
½ cup of mustard oil
Salt to taste
A small pinch of sugar
1 ½ cups -water                                                       


1.       Begin by making the mustard seed paste, so in heavy mortal n pestle or in a stone grinder or in blender, crush the mustard seeds with a little water until they are all smashed and turned into a paste. Next dilute that paste with a little water and pass it through a sieve so that we get a smooth texture and also the outer husks of the seeds which are still there are filtered out. Next make a paste of the green chili and the garlic.

2.       Let’s handle the fish now, so dry the fish and then sprinkle ½ tsp of turmeric powder over them and using your hands make sure that all the fishes are lightly coated in the turmeric, give them 5 minutes. Begin by heating the pan in a medium flame, when the pan is quite hot, add the mustard oil ( add half if frying 3 fishes in the first batch), let the oil come to a smoking point then reduce the flame, now sprinkle a little oil over the fishes, coat them and then place them carefully in the hot pan. They will start to sizzle, increase the flame to medium high and give about 4-6 minutes on each side. Don’t be tempted to move the fish in the pan with your spatula…this is what will break the fishes easily, if you feel the heat is getting a bit too high, lower it. After about 5 minutes check once with a spoon, tilt the fish carefully in the pan, see if it is coming out easily and if they have browned on that side, if yes flip them over. So when both the sides are done, take them out in a plate.

3.       In the same pan and in the same oil add the whole mustard seeds, let them pop, reduce the flame now, while the flame is at low add the crushed garlic and green chili paste, mix the turmeric, red chili powder, coriander powder with 1 tbsp of water and add them to the pan. Give them 2 minutes, then add half of the chopped coriander leaves, saute for a minute, then add half of the mustard paste solution, mix everything well then add the rest half of mustard paste solution, let the flame be medium now and give it about 5-7 minutes stirring them in between. After about 6-7 minutes you will see the oil is leaving the sides of the paste in the pan, increase the flame to high now, add salt and then add the Worcestershire sauce while the pan is hot, then reduce the flame and add the soy sauce. Check to see if the seasoning is right; adjust n add a little pinch of sugar.

4.       Now add 1 ½  cup of water, add the fishes with all their oil in the pan, make sure that the fishes are almost submerged in the liquid, then cover the pan and let it simmer gently for 10 minutes, flip the fishes  over in between,  after 10 minutes the gravy will thicken a bit. We are almost ready, switch off the flame and sprinkle chopped coriander leaves and 2 half-slit green chili and cover. Leave it for 5 minutes and we are ready. White rice goes just great with this recipe, so go get it.


                                    May the delicacy of the fish reach to all of us ;)


Monday, March 3, 2014

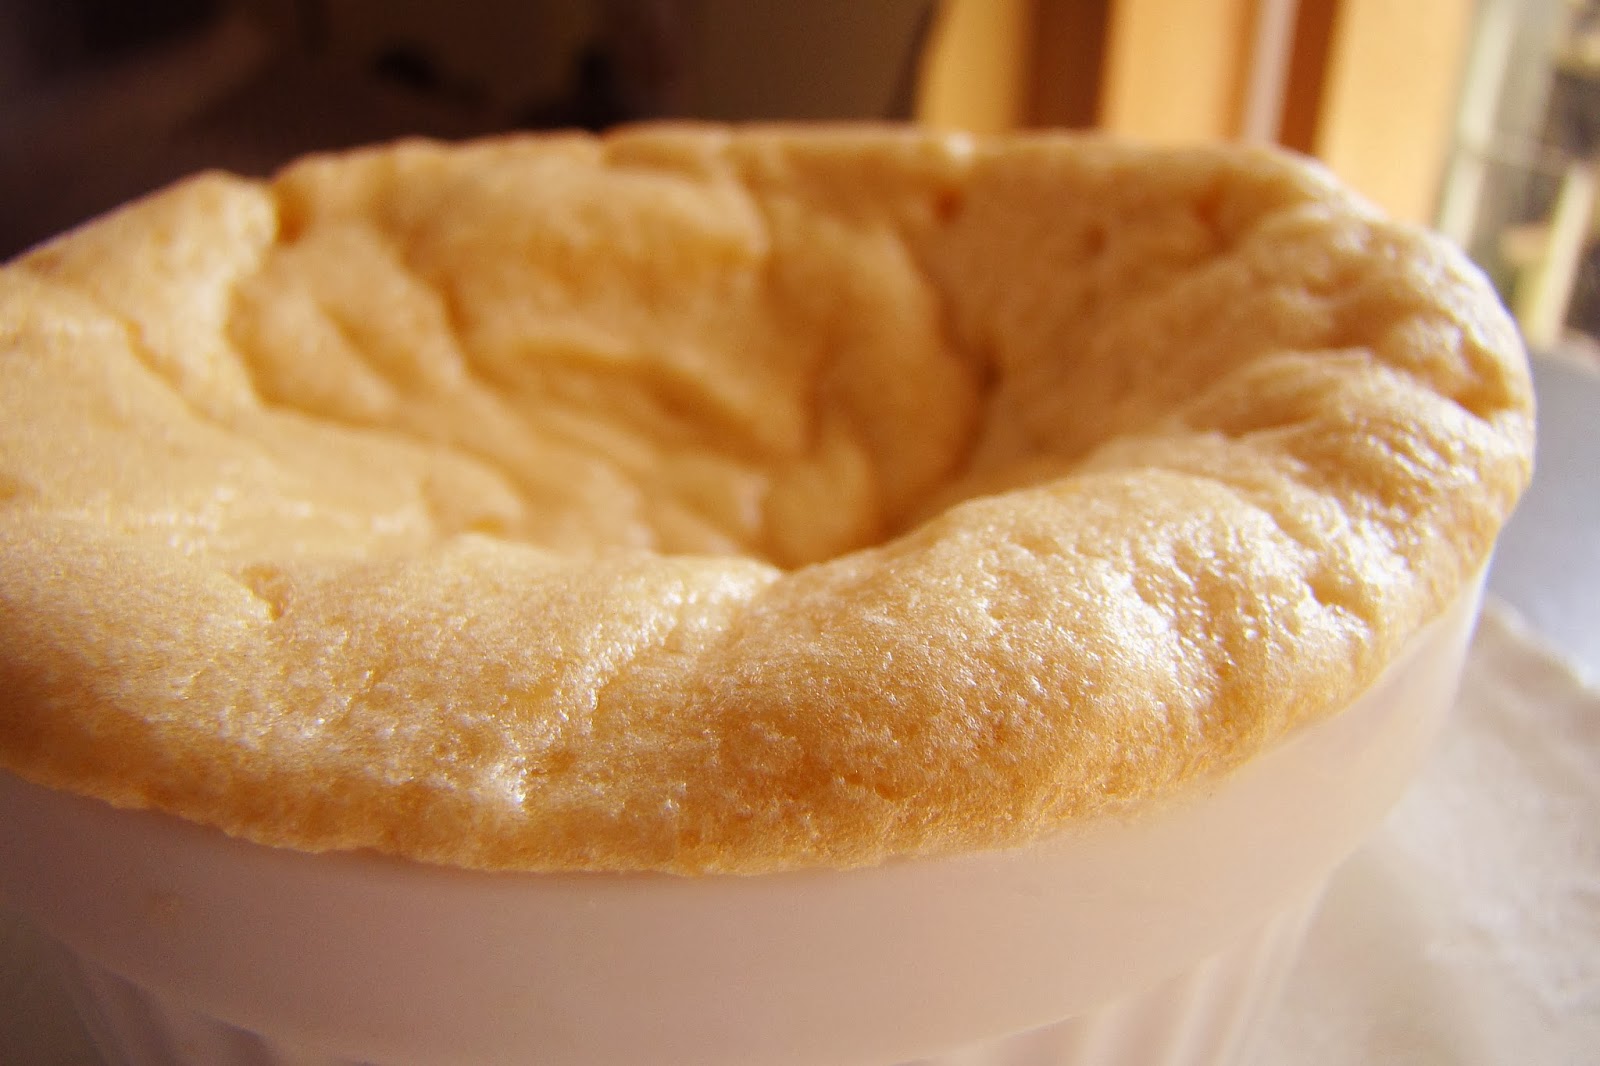
A sweet sexy soufflé - The love affair with Gurr n how it got soufflé-d in love


                                                                                    Valentine’s Day is long over, thankfully so. I am not fan of Valentine’s Day in general, it’s quite commercialized and what is so special about a day when on that day red roses and every flower costs so much. Now in fact when it’s all over, now if you gift someone a red rose, yellow rose, or anything out of love it makes this extra special. There is no pressure of giving gift because it’s Valentine’s Day, so now it’s really comes from within you. I do believe in the power of sweet sudden surprises. If you want to express your love to someone make him/her this soufflé and you will touch him/her deeply. If that someone is a person you romantically involved with, try sleeping beside him/her without his knowledge while he/she is asleep, so when he/she wakes up, sees you. Now that’s something.


Forget about romance and all its lights and shadows and let me tell you about this soufflé. First things first this is a soufflé made with a type of Jaggery, date-palm jaggery. You know there are these date-palm trees and people collect the flavored sap from the tree by putting cut marks or incision at the top part of the tree and they make a way for the sap to come n get collected in a hanging earthen vessel tied to the tree. Now this sap has a distinct flavor and you can drink it fresh, when it is put on heat and reduced by simmering for long periods of time it develops an unique taste, more intensified. That’s the rough idea of how it is made, as for turning it into jaggery it is further reduced and then it solidifies as it cools down.


                                                                                                  Now for the soufflé I could have made it without the addition of crème patissiere, in that case it would have been even more light n puffed up, but then I thought I want it make it a little more rich so I made the crème patissiere with the melted Nalen gur, which gave it a pronounced flavor of that golden gur. And it does bring a touch of creaminess in the soufflé, however on another day I might make it without the special crème patissiere. Do you know that in French the word “soufflé” literally means “puffed up “? I read somewhere that day when we will make a soufflé of something it will mean to arrive at a texture, like airy, light, puffed up-now that is a way of looking at this word now. The word “soufflé” made into English vocabulary in the early nineteenth century, where it used to be described as an airy cooked confection of beaten egg-whites with the egg yolks with a savory and sweet flavoring.


                                                                 One thing about this special soufflé is that it tastes better the next day, as least that what I found out, I kept them in the freeze and next morning it was such a pleasure eating it, soft airy gurry goodness.  And I thought this is quiet it! So fit for the Valentine’s Day and in fact for any day when we want to make it special and we make this soufflé for the people we love and watch the smile on their face as they get soufflé-d.  somehow I ended up imaging this- I am little kid and my mom makes this soufflé sometimes, and I watch her at times curiously how she makes it, she beats the egg-whites, makes the pastry crème, pile them high on little ramekins and when she gets them out of the oven- woooo! They have risen like sweet monsters! And my anticipation makes them even tastier. So if you are a mom reading this having little kids, do make them this and they will have such wonderful memories.


                                                                                         By the way that morning was quiet eventful when I made this soufflé, first I was so cautious that there is no trace of egg-yolks in the egg-whites, not a drop fat in it and in this super-cautiousness  I tumbled the egg-whites on the table…errghhhh! Disaster! Disaster! And it was only the beginning. I fixed the egg-whites telling myself to calm down as I started making the crème patissiere and the point comes when it starts to get thick and you have whisk it all the time at that point for a minute, so there I was whisking madly and I checked my mobile too see if a minute is over and somehow in a sweet sleepery moment my mob jumped into the crème patissiere bowl! Lol! I couldn’t believe it, I snatched it out before it even submerged a bit into the crème since it was so thick...it all happened within some seconds-the fall and the rescue. But oouch ouch!  What an event! Ha-ha…I ended up laughing about it after that and even after these small disasters in the kitchen the soufflés puffed up like good boys. So V for victory and P for puffed up.


                               You can beat the egg-whites with a hand beater or a stand mixer or if you are like me young and energetic trust your hands. After making that mayonnaise, beating the egg-whites to soft peak was a Childs play to me, literally. And it’s fun, as I beat in with my hands I literally see the change I bring in, starting with the liquid egg whites as they absorb the air and become so airy and white.

                                      So now I will tell you the special recipe. Whisk whisk puff puff.


The recipe:  you will need
For the crème patissiere/pastry cream:     
 50 g shaved nalen gur/date palm jaggery
2 egg yolks
25g corn flour
250ml milk
25m unsalted/salted butter.

Begin by making the crème patissiere because it will take some time to cool off while you will prepare the egg whites. Whisk together the shaved gur, egg yolks and corn flour together in a bowl. Put the milk in heavy based saucepan n slowly let it come to a boil, just then remove it from the heat and whisk one third of the milk into the egg mix. Now quickly tip the egg mix back into the milk pan and keep whisking. Then put it back in the low heat, stirring constantly let it come to a boil, as it comes to a boil give it 1 min, don’t stop whisking. After that take it off the heat, add the butter, stir until it melts. So let it cool off to warm and then cover it with cling film and leave to cool it off. Remember when we have to fold the pastry crème with the beaten egg whites; we need it a little warm, not cold.

For the Nalen gur syrup: 
4-5 tbsp of shaved nalen gur, melt in a low heat with 1 tbsp of water, once melted keep in a low heat for 2 mins. Pour 1 tbsp or more each into 4 ramekins with base diameter of 2 1/2 inches (6cm), top diameter 3 ½ inches (7.5cm), 2 inches (5cm) deep, lightly buttered. Pour so that the base of the ramekins is coated with the syrup.      

 Pre-heat the oven to 170 Celsius, 325 Fahrenheit, gas mark 3.


 For the soufflés:   

3 large eggs
1/8th of big lime or 1/4th of a small lime or 1 tsp of lemon juice
2 tbsp of castor sugar


Separate the eggs, I find it to separate the eggs safely when they are just out of the refrigerator, then I let them come to normal temperature. Take a big airy bowl and make sure it is very clean and grease free, just to be sure take a little lemon or lime wedge and wipe the bowl with it. Next put the egg whites into the bowl and squeeze the lime or lemon juice into the egg whites. Start beating with a big wire whisk or with a electric hand beater, if you are using an electric beater, start slow, then to medium to high, beat the egg whites to almost stiff peak but the tip of the egg whites should bend down a little when you pick them up, so we don’t need stiff peaks actually, lower than that, slightly higher than soft peak, while your egg whites are getting to become fluffy as you are beating them add the castor sugar slowly. If you are whisking by hands like me add the castor sugar once you see the egg whites reaching the soft peak, first add 1 tbsp and after sometime add another. We are doing it just to give the beaten whites a little sweetness and to stabilize it also.

                            Now when you have reached that stage where it is almost stiff peak but the peak bends down a little as you put it up, so now it is time to fold the warm pastry crème into the egg whites. So take about 2 tbsp of the egg whites into the pastry crème and whisk it vigorously to light it up, then take about one fourth of the egg whites and still vigorously beat it in, then take half of the egg whites and gently fold it with a spatula by gently lifting it up along the circumference of the bowl and slowly folding it in the middle. Gently fold in the remaining egg whites.


                             Now spoon the mixture into the ramekins, pile it high if you want to, then run a finger into the inside rim of each one. Now place them in a baking sheet and put them in the middle shelf of the oven and bake for15-20 minutes or until the tops start to get golden. Then take them out and  you can see your soufflé is so puffed up, as you take them after 5mintues they will sink, that’s normal, don’t let your heart sink, let it rather sing a song because it is so delicious, even more on the next day. Why they will mostly sink is because we have folded the heavy crème patissiere into it, which is the reason. Enjoy them completely now whenever and however you like them hot or cold or normal. Bon appétit.


Friday, February 7, 2014

Sourdough Toast with Spicy Mayo served with Tomato, Cucumber slices


                                            Hello reader...How is your day going? Mine is a bit hectic so far, it kept me on my toes which I kinda enjoyed. The days here have stretched themselves quite a bit to be longer, while a month ago at 5 in the evening it used to be pretty dark, the same darkness now appears around 6, an hour have extended in the day, which reminds me of the summer. I love spring which is almost now, I think of spring and I think everything coming back to life, new leaves and fresh young green.  What I am secretly wishing is for the winter not to go away so quickly.


                                                                                                                 Do you remember the stupid mayonnaise I made, which surprisingly tasted good! Well I am not exactly thinking of going back making mayo again but that doesn't mean I can’t tell you what I did with it! 3 days ago I got myself a sourdough round loaf, I picked it up from a bakery store thinking I wanted to make panzanella with it, but I kept eating it with the mayo in between with crisp cucumber and tomatoes until I realized there wasn't much left for the panzanella, so maybe next time. What the toast with spicy mayo does remind me of are the days of the spring. Like the spirit of the spring can be found on these toasts, fresh clean flavors, the amazing juicy crunch from the cucumbers, the creaminess and the subtle warmth of the mayo made me feel so satisfied.


                                                               This works very well as an appetizer, with such less work. I mean making the mayo is another story but once you have done that, it gathers itself in minutes.  They are wonderful for the summer as well as in the spring, while I am praising them here in the winter. If you have a little party or gathering of friends in your home or you just wanna have a little bite make yourself these. The crispness of the warm toasts with the creamy tamarind mayo, the freshness of the tomato…doesn't it sound appetizing! They do. And in fact you can do many things with it, put on the toasts anything that you like. And if you are serving them to your friends, you might receive a lot of compliments plus more requests for them.  


      So you are hungry? Okay I will tell you how I made them, which is so very simple, you only need some minutes. Bon appétit!


The Recipe: you will need
Loaf of sourdough bread or any bread that you have, sliced into flat discs of ½ inch thickness
Stupid Mayonnaise
Sliced thin round disc of tomatoes
Slices thin disc of cucumber
Finely chopped ½ a medium red onion, tossed with 1 tsp of lime juice.


1.       Begin by chopping the red onion, then toss them with the lime juice, leave it for 15 minutes.
2.       Slice the bread into ½ inch thick flat discs, then put them on a hot pan on a medium flame, give them around 10 minutes until both the sides crisp up to a golden brown or just put them in oven until they are almost toasts or even in your toaster, just don’t make them very brown.
3.       Slice the tomato and the cucumber into thin discs, keep aside.

4.       When the bread slices are crisp golden brown spread the tamarind mayo on them generously and then arrange the tomato and cucumber slices alternatively on them. After that just sprinkle some of the limey red onion pieces on them slightly.


                           Ah you are now ready to have your bite. Come on bite! Try to eat them warm, its fun. Oh and tell me how satisfied they made you, I will be listening to you.
 

Sunday, January 26, 2014

A childhood full of tomato chutney...


Hey my dear reader! How are you doing? You know what I think…I think tomatoes are made in heaven! I mean I know it is a fancy thing to say, and tomatoes grow in their trees, so heaven must be in the air…but once in awhile when I start to love something or someone dearly,  my mind fills up with beautiful imagination – a different world is created where the boundaries of reality and imagination exchange each other’s caps. Now the thing is I really like tomatoes…some of my favorite food items contains them in abundance, imagine a pizza without tomato sauce! Or a Chana Masala without them! Or Ghughni without the red ripe tomatoes in them? Or Bruschetta without tomatoes! Spaghetti without tomato sauce! Even Bloody Mary will be incomplete without them! Sounds dull right? Yes the world will be dull without tomatoes. As a kid I was a huge fan of tomato ketchup, I grew up licking it, pouring them on noodles until it was  a bit too much, pouring them on puffed rice, samosas, puff pastry and what not! I remember as  a little boy I used to have tomato ketchup just like that anytime  really and when the big bottle was about to finish, no more drops will fall off, I used to pour a little water inside the bottle followed by some shakes so the water will turn into a lighter tomato ketchup and have it! Imagine this! Oh and where I will be without my glorious tomato chutney! Without the chutneys a big part of my childhood will lose its flavor, as if the sweet chutneys added their sweetness and flavor into my childhood and made it a sweet comfortable place.


                                                                      So how can I not tell you about chutneys? Especially the ones I adore. Chutney is Indian in origin and as time passed by it spread its flavor across the seas, so much so that chutneys are now established part of British cuisine. However the chutneys in India are quite different than the ones you may find in Britain, especially in the use of malt vinegar used in British chutneys for long keeping, so it becomes more close to the idea of pickles. In India vinegar is not used in any chutney, also the fact that there are almost 2 categories of chutney-the sweet ones and the savory ones. Basically chutney is a relish made from fresh fruits or tomatoes or dried fruits like dates, raisins, kismis and figs, from sun-dried mango pulp cakes/aam-papd/aamsatto plus the spices used in them which vary along with the ingredients. Chutney is real comfort food; you can have it at the end of a meal which will only make the ending sweeter, isn't that nice! You can have it mixed with a little rice, with crisp fried papadums, with a crisp thin toast, even spread on a thin crust pizza base…and we have in hand a very delicious sweet pizza... yummy. You can even use it as the main ingredient of a dressing for a salad...Like I do when I make green mango chutney which I later use as a dressing on a simple salad and the salad bursts into a song as the chutney comes into play! Oh I think I am getting carried away. By getting carried away has its own rewards…we reach new shores where we have not been before.


                            I simply love sweet chutneys, they are my comfort deserts, bursting with flavors and they pamper me so much. I enjoy them on a wet monsoon day when everything around me is wet and I dig into the chutney with my boat of crisp fried papadums which is super yummy, or a summer evening with green mango chutney, some tamarind chutney, on winter days like this I am with date-aam-papad chutney, mix fruit chutney, some days I’m busy with deep red cherry chutneys… I am seducing my soul writing about chutneys so much...because I have such memories it is very easy for me to get myself there mentally as I write it. What I really hope that you, dear reader, if you have never tasted chutney before, now the time has come that you must and after that experience you will be a very happy person.


The fun part was in the elaborate way of eating chutney with my hands, more hands- very less spoon experience. I used to sit with a big bowl of tomato and green mango chutney with tiny spoon, I only used the spoon to lift a little amount of chutney into my palm , then lick it, dip my fingers into the chutney, lifting up chunks of tomato n mango out of the bowl, balancing them on my fingers tips on the way to my lips while some drops of the syrup of the chutney will fall all over me, and then next moment is chutney mediation moment, eyes closed, lips sealed with chutney…ummmm. It was such a fun where the experience of enjoying it became as fun as eating it. I used to eat it at times with my sister and my friend. Now it is still fun for chutneys stay chutneys all along the time and they make us happy just like yesterday.


I think chutneys are quiet romantic food, if someone has to make a sweet impression on someone or just to make someone happy, prepare a delicious chutney and you will see how far it goes. I hope it goes very far. Now there is a saying “ all is well that ends well”, now this I find to be true, wherever I go out to eat at a traditional place  or I cook up a whole traditional meal ending with chutney, it becomes the most satisfying moment to end with a good chutney. There can be blunders in the course of the meal where some items didn't make you happy, while some blew my mind away with their flavors, but as the sweet chutney makes it entry…u la la…i forget about all the blunders, superb dishes are forgotten, all I remember is the chutney.


Aright so now straightaway I will give you the recipe for the sweet tomato chutney. Oh! By the way did I tell you that the word chutney has its source from the word “chaat” which is a verb and which means to lick, so you must lick.


The recipe: You will need
4-5 medium red ripe tomatoes
1 tsp of five spice (cumin, fennel, nigella seeds, black mustard, fenugreek seeds-use half the amount of fenugreek compared to amount of each individual other spice, like 1 unit each of cumin, fennel, nigella, black mustard n ½ unit of fenugreek seed.)
¼ the block of aam-papd/aamsatto block cut into ½ inch cubes.
A handful of dates halved or quartered.
½ cup of sugar (you may need more or less depending on the tartness of the tomatoes or how sweet you want your chutney to be)
1 ½ cup of water
 Pinch of salt.
½ tsp of vegetable oil.
Around ½ tsp of tamarind paste or store brought tamarind chutney for a touch of sourness.


 Begin by removing the eye of the tomatoes from their top part , then  cut them into medium chunk along their length, say making 4-5 chunks out of one half of the tomatoes. Having done that place the sugar and the water together in a pan, then put the pan on low flame, stir in between until the sugar has completely dissolved , then increase the flame to medium and let it come to a simmer. While it comes to a simmer take another pan, on medium flame, heat the oil in the pan, then add the five spice in the pan, on low flame give it 30 seconds until the mustard seeds start to sputter, then add the tomatoes, toss them with the spices for a 2-3 minutes. Now transfer the whole batch of tomatoes along with the spices in the sugar syrup. Add the dates and half of the aam-papad cubes and then cover the pan and let it only simmer like that for about 15 minutes. Add a pinch of salt in between, check the sweetness, if you think it need more sugar according to your taste go for it. after about 15 /20 minutes it has reached the stage of being called a chutney, most of the water by now has reduced now, it is much more thicker now, the tomatoes are softer, part of the tomatoes has melted into the syrup. If you would want the chutney to be little thin stop at this part, if you want otherwise give it couple of minutes. Now add the tamarind pulp/chutney, mix well, and put the flame off. Add the rest half of the aam-papad, cover the pan and leave it for 5 minutes. Super simple isn't it! Now you can start licking. :) enjoy it with crisp friend papadums, crisp chips, crisp tortilla, crisp roti, on toasts, on graham crackers or just on their own. Bon appétitJ