Featured Post

Go Galette Go! My heart will always Galette on…

5 Beautiful Galettes: Red Pear Galette, Peach Tej Patta Galette, Panchphoron Mango Chutney Galette, Cherry Clove Galette n Paneer Tomato B...

Showing posts with label sweet snacks. Show all posts

Wednesday, December 16, 2015

Phenomenal Pati-Saptas, a dream folded in three


Amazing Rice flour pancakes from the heart of Bengal, stuffed with kheer n Aam-satto/Aam-papad


When it comes to pati-spatas , everything becomes clear water, there is no conflict or confusion, it is delicious like a dream, soft like love n slightly crisp at times like reality itself. I have loved it all through my childhood, love it dearly now and as I make them I get dissolved in their being. We can call them sweet pancakes generally but trust me they are so much more than that.


The batter is made from rice flour mainly, sometimes semolina and flour is added to the rice flour and milk is added to get to the desired thin consistency. When it comes to the stuffing we have very beautiful choices, one is freshly grated coconut cooked with date jaggery which is the supremely delicious ‘Nalen Khejur Gurr’ or sugarcane jaggery which has its earthy sweet magic, another is kheer which is milk simmered until it almost solidifies n then mixed with a little sugar. In my version I have created a new flavor for the stuffing and it was inspired by a gift- some days ago my friend gave me a beautiful gift-home-made dry mango cakes-‘AAM-SATTO’, a box full of them. Aam-satto is made from fresh mango pulp mixed with water and a touch of spices, then the batter is spread thinly over plates and sun-dried until the water evaporates and the rest settles as a thick layer of cake-the flavor intensifies and changes under the sun light and we get aam-satto.


Back home I softened the aam-satto with milk, then mixed them with kheer until a beautiful rich mixture was obtained- sweet n with a slight touch of tang and filled with that mango flavor. When I stuffed them inside the soft pati-sapta they made me smile, they taste exclusively delish and my friend found them refreshingly different delicious.


Winter is a good time for pati-sapta, in fact every time is a good time for them but in the winter it gets special for a number of reasons, one is it feels great to bite into the warm pati-saptas in a cold afternoon, second in the winter the majestic nalen gurr which is a type of jaggery made from dates, becomes available and that takes everything to a whole different level.


Pati-sapta is a pithe, pithe is a term used for deserts made from mainly rice-flour or a combination of rice-flour n flour or semolina made during a certain season or festivals in Bengal.


So now since I cant wait any more for the recipe, here you go.


For The Recipe: you will need

For the Pati-Sapta

Rice-flour- 2 cups
Plain flour- ½ cup approximately
Semolina- ¼ cup approximately
Milk (full fat/skimmed)- 500 ml approximately
Salt- a pinch
Sugar- 2 tbsp
Vegetable oil/ghee- ½ cup


For the Kheer

Milk (full-fat)- 1 litre
Sugar – about 2 tbsp


For the Aam-Satto stuffing
Aam-satto/dry mango cake/aam-papad- 150 gm
Milk- a little to soak them
Kheer-Half the quantity of kheer made above


  1. Begin by adding the rice flour to the milk at room temperature, the milk should not be cold, whisk in the rice flour with a wooden spatula or wire whisk until the batter is smooth, then add the semolina and whisk until smooth, then add the flour n whisk until the batter is smooth. The consistency of the batter should be thin n flow-y, like if you pour the batter from a ladle on a pan , you should be able to spread the batter relatively easily over the surface of the pan. If the batter is not thin with the given measurement above add some more milk to achieve that consistency, then add a pinch of salt to it, mix well, now let the batter rest for about 30 minutes.
  2. Making the kheer is a complete new recipe, for that take full-fat milk in a wok/kadai with a large surface area and let the milk come to a boil, then reduce the heat to lowest and keep simmering until the milk reduces to a solid mass where all the water component from it has evaporated, this will take about 30 minutes. Keep scratching the sides every 4 minutes and incorporate that into the milk as it is getting done, don't leave the milk and go away when this is happening, if you are not using a heavy bottomed wok the milk can burn at the bottom and ruin all your effort, so if you can, use a heavy bottomed wok and stay near the milk and stir it well every 3 minutes. When the milk has been reduced to a solid mass almost, stir continuously until it becomes a solid mass, then add the sugar and let it melt completely, then remove it from the heat onto a plate, the kheer should be sweet but not too sweet.
  3. For the aam-satto kheer, soak them in warm milk for half an hour until they soften, then smash them with a fork until uniformly mixed, after that add half of the kheer n a couple of teaspoon of milk to make a spreadable consistency mixture. When that is done, you have to do the same with the kheer, if the kheer is very solid , add some milk and lighten it up.
  4. Time to make the pati-sapta finally, so take a flat frying pan or chatu or pancake pan, keep it on high heat and let it get hot, then take any flavorless vegetable oil like soya bean oil or ghee, smear it over the surface of the pan, pour 1 tbsp of oil and heat it in the pan then pour it over the batter n mix it well. Now make the flame go to minimum, smear the pan again with ghee or oil and take a ladle full of the batter and lift up the pan in one hand and pour the batter on the pan, then spread the batter in a round form, you can do it with a spatula too, just work with a light hand, push the batter lightly to create a round shape, then increase the heat the medium and give it about 1 minute, with a spoon lift the pancake slightly to see if the surface has caramelized, if not give it some more time, then take and place one tbsp of aam-satto kheer mixture and spread it in the middle of the pancake , then fold the pan cake in three parts, then take it off the pan.
  5. So now smear the surface of the pan again with ghee or oil and lift the pan, mix the batter well and pour a ladle full of batter on the pan and do like before. Keep the initial temperature of the pan low so that when you pour the batter it doesn't settle immediately in the pan, when the initial temperature is low you have time to spread the batter easily either by rotating the pan or by gentle spreading the batter with the spatula, once the batter is spread increase the temperature to medium and let the caramelize, then fold it in three.
  6. Similarly make all the pati-sapta, fill them with aam-satto kheer and kheer. And then we are done.

 
So here we are, we have successfully made all the pati-saptas and I am sure you have tasted them already while you were still making them, that's what I do all the time, now tell me, don't they just taste out-of-this world, soft succulent inside, crispy outside and so soft, so now share it with your loved ones, eat them warm or cold, they are delicious in every stage, so now you have one more great recipe in your collection. So you know what! Bon Appetit.

Saturday, November 22, 2014

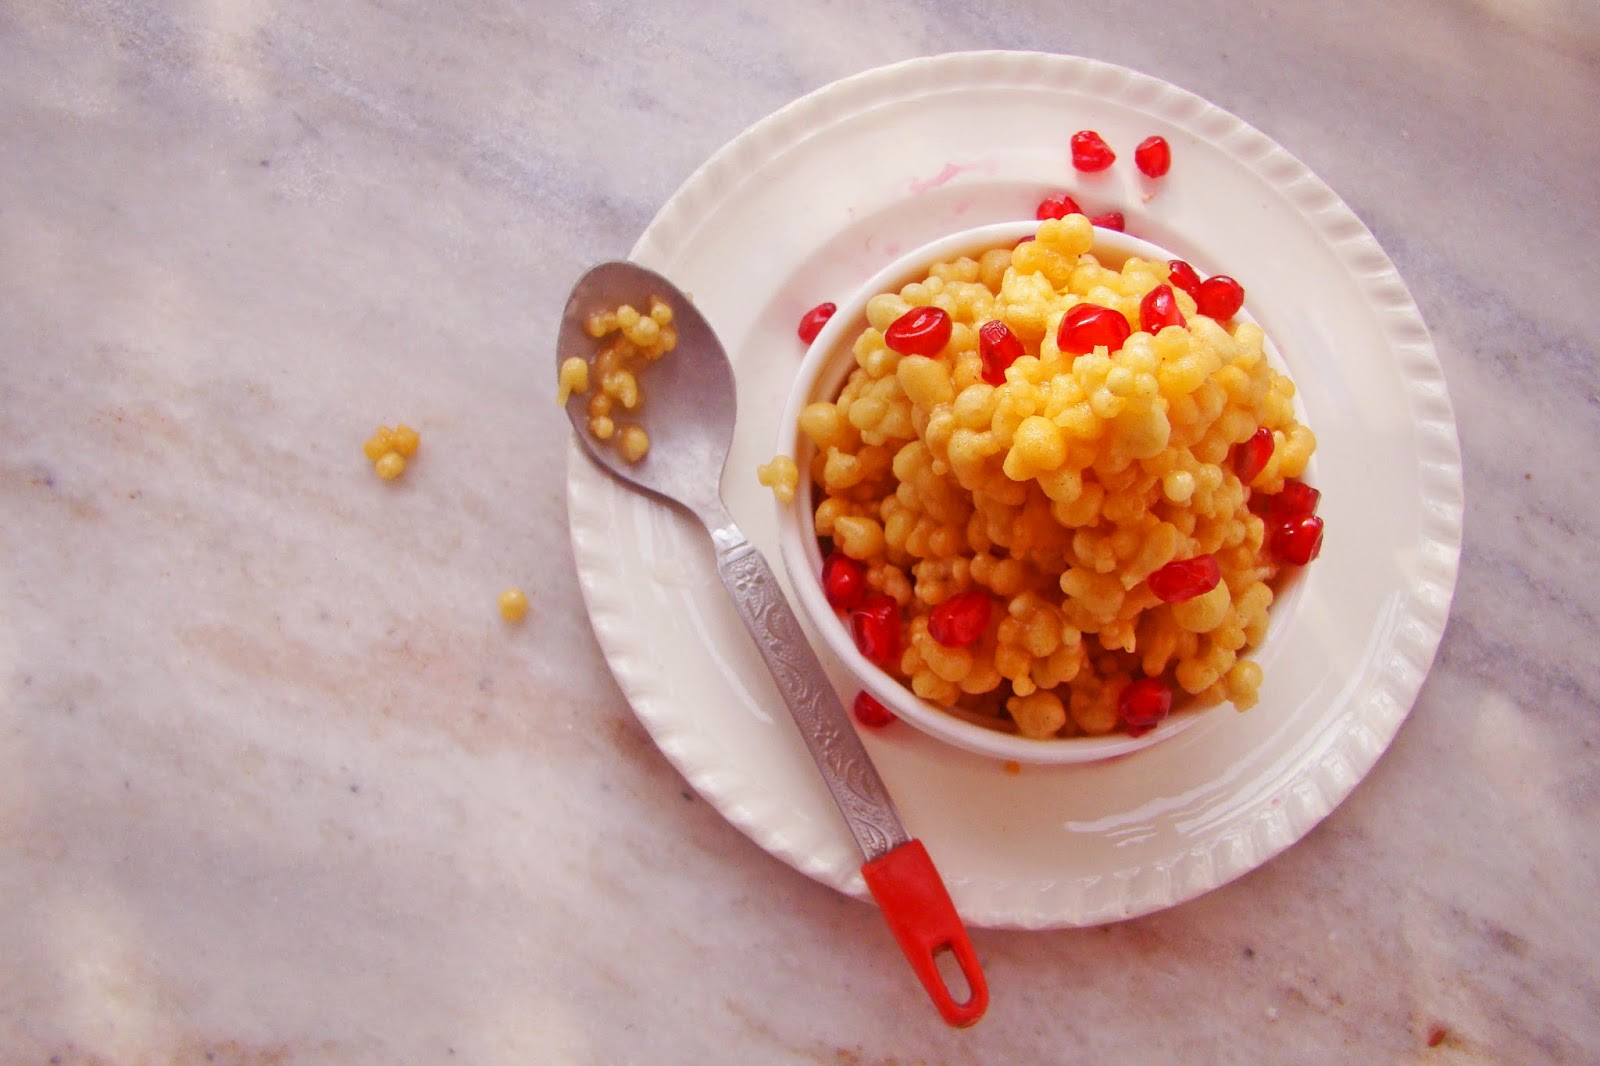
The Tower of the Beautiful Boondis

Meethe Boondi, Mishti Bonde, small fried balls of chickpea flour dipped in sugar syrup


First of all I will tell you what are ‘Boondis’- well basically they are a sweet snack, they are prepared from a mixture of Besan/Chickpea flour and water, then deep fried in oil, then dipped in a sugar syrup, so the result is numerous crispy tiny balls coated with sugar syrup or often they are also soft n coated with sugar syrup. Whether they are crispy or soft one thing is common about them, that are they are just delicious in both ways, there is something about the flavor of the besan, the flavor of the oil, the sugar syrup absorbed inside, the crunch and the softness that is addictive. We just wanna keep on munching at very short intervals. Ha-ha.


This is one of my sweet favorites right from childhood, I think first of all it is the appearance that attracts everybody to boondis, the numerous small yellow balls hold together at times by a light coating of sugar syrup or the shiny soft balls that is indeed tempting. When we taste after the visual bite there is a satisfying feeling, they are not very sweet, moderately sweet.  


When I was a kid my dad would sometimes bring boondis/bonde from the sweet shop on his way back home from office or market and my elder sister n I would kinda jump on them-mostly we used to eat them on their own or at times we would eat the boondis with Luchi/Puri, crispy puffed rice known as ‘Muri/Murmure/Mamra’ and at times with rotis. The boondis that my father used to bring from the shops were always soft n shiny and we will mix them with crispy muri, which was such a play of texture, the soft boondis and the crispy puffed rice…let me say yummm... Try the boondis with paratha and you will also lick your fingers.


Still to this day when my elder sister/didi visits us, often she goes to the sweet-shop and she comes back with packet of soft boondis, she loves it now equally if not even more! My mother she loves the old way when she combines them with the crispy puffed rice.


Making boondi is rather easy, it is not very hard at all, in fact there are some crucial steps which if not done properly will make it go wrong, here I will tell you about them, so let me say this again, making boondi is easy. First of all the mixture of the chickpea flour/besan with water has to be beaten well with a ladle or whisk, you have to beat the mixture for about 10 minutes totally in 2 stages. Secondly the mixture of the besan n water has to be light n not thick, if it is thick the boondis will tend to have a tail with them and they will be quite hard, so keep the batter light that easily pours from the ladle, so thin consistency. Thirdly the oil has to be moderately hot, when we will place a drop of batter in the oil it should come floating to the surface of the oil in about 5-7 seconds, if the oil is lower in heat them the boondis will absorb a lot of oil and they won’t come to the surface in that time, if the oil is too hot then immediate they will go brown and before you can take them out they will go dark brown, so moderate heat and low to medium flame. Keep a big slotted spoon at hand which is called ‘Jhanjhri’ in Hindi in hand, in fact keep 2, one to produce the drops of boondi and one to take them out of the oil.


So let’s get making them! Here is the simple recipe.

For The Recipe: You will need
For The Boondis:
Chickpea Flour/Besan- 2 cups
Water- about 3/4 cup
Salt- tiny pinch
Vegetable oil- 1 ½ tsp
Vegetable oil-4 cups for frying


For The Sugar Syrup:
Sugar- 2 cups
Water-1 -1 ½ cup

To serve: Fresh Pomegranate seeds


1. First of all in a bowl add the besan, half of the water and with a ladle mix the besan so that there are no lumps , if you add all of the water at once you will have a hard time finishing off the small lumps in the watery batter, so add little water while the batter is tight n make the batter go smooth in that condition , then add some more water, make it go smooth again, then some more do the same, add the pinch of salt, mix well. Now the consistency has to be thin pouring consistency, so the amount of water I have mentioned may vary.  When you drop the batter from a height it should fall freely, test the batter by pouring a ladle of batter on the slotted spoon and drops of the batter should fall from it freely at almost one second or half second intervals. If the batter is thick the boondi will be hard and they will tend to have an elongated part with them-the tail. So the batter will be on the thinner side, not thick. When the batter is at this consistency whisk the batter for about 5-6 minutes, then rest the batter for 10-15 minutes more.

2. Let’s make the sugar syrup, so in a pan or wok add the sugar n the water, on a low heat stir this until all the sugar melts, then increase the heat to medium and give it about 3-5 minutes, after 3 minutes check the syrup by placing a drop of syrup on plate and test it with your 2 fingers, and it should feel slightly sticky like honey. So after 3 -5 minutes if you find the syrup has gone a bit thick n has become like honey, put off the flame and remove it from the flame.

3. In meantime when the batter is resting, heat 4 cups of oil in a big, kinda shallow wok/kadai or pan, make sure that the wok or pan is not deep; we need more surface area so that we can pour a lot of boondis at one time. If the pan is deep n small then we will have to fry the boondis in many batches. So heat the oil on a medium flame till it is moderately hot, test by dropping a drop of the batter and it should come floating to the surface in 5-6 seconds and also see if the boondi is round in shape.

4. After 15 minutes add 1 ½ tsp of oil in the batter and whisk it in, whisk the batter again for 5-6 minutes well. This whisking is important. So now we are ready for making the boondis. Take the slotted spoon and pour a ladle full of batter on the slotted spoon and you will see that tiny drops are falling on the surface of the hot oil and moving away to the rim of the wok, take another ladle full of batter n do the same. Do it until the whole surface of the oil is almost filled with little drops of the batter. Give them a minute then with another slotted spoon move around the tiny balls and flip them lightly in the oil. When the balls start to go light brown n crispy take them off with the slotted spoon and place them in the sugar syrup.

5. Now we will make the next batch, so make sure the oil is not cold or too hot, then do the same as before to make the boondis, and after about 1 ½ to 2 minutes when they are light brown n crispy take them out and place them on the syrup. Keep the boondis in the syrup for about 10-15 minutes, then take them off on a plate and now you can munch on and share with your loved ones or hated ones just to make them love you! Combine them with fresh pomegranate seeds and see the magic of both of them together!  So please enjoy and keep the smile on. Bon Appetit!


Sunday, November 16, 2014

Til Ke Laddu/Tiler Nadu- A rolling laddu gathers no ants, gets picked up by hands

Sesame Seed Brittle sweet balls with caramelized Jaggery, Til Ke Laddu Gurr walen , Tiler Nadu Gurr diye


So just before Diwali in this year I made something sweet, these laddus made out of sesame seeds and jaggery, laddu is an Indian term which describes any sweet spherical in shape, a ball, so a laddu always refers to a ball shape. Now I love sesame seed laddu, they have a unique flavor, subtle, pleasant and heartwarming.  I have not posted anything in my blog for 2 weeks which is a long gap I fear and my readers must be disappointed with me so my apologies dear readers and trust me when I made these luscious laddus this October I thought of you all, I thought of telling you all as soon as I made them on that very day, I imagined all of your smiling faces at different corners of the world, the love for good food –this is what connects us. So here I am in mid-November telling you about it and just to make it up to you I have to give you something sweet to sweeten things between us, so here I gift to you the Sesame Seed Sweet Brittle Laddus. Have your big bite J


                               As a kid these laddus were a delicacy to me and my sister simple because these will appear during a certain month on the year, especially around the Durga Puja n Laxmi Puja. There are certain food that are associated with a certain event, religious or social which are made only during a certain period of a year and when that time is over so will disappear these foods like magic! My elder sister just loved these laddus like anything, I remember the expression of fascination and happiness on her face as she hold the laddus in her hand and shared it with me and then the moment when we bite into one, crunchy, chewy, sweet. Oh how satisfied was that look on her face after the bite and how we cherished those moments n the laddus. And all those laddus in childhood came from either sweet shops or from someone’s home during that puja. My mother never made these at home, rather she made coconut laddus. 


                                                   One thing that is important n memorable about a sesame laddu/Til ke laddu is the ‘Bite Experience’. When you bite into a sesame laddu often times it is hard which requires a bit of strength of your teeth and at times the laddus are relatively softer which give away under a slight pressure under your teeth. Now it all depends on the level to which the jaggery has been caramelized- if the jaggery is caramelized only slightly it will not hold the shape of the laddus, if the jaggery is taken to a very thick n dark stage it will be very hard when cold and this will create a real hard bite experience, when the stage is in between the laddus when cold they will be soft to hard creating a rather easy bite experience. Now a very hard til laddu will have a longer shelf life but we don’t need a longer shelf life for til ke laddu because they get finished so quickly!


                                                                                So it makes all the sense to make the sesame laddus bit softer, easy to bite. By the way did I tell you that some of the sesame laddus are so hard that if you throw them to someone it can seriously hurt them! Or in case you are playing cricket and lost the ball you can replace with a sesame laddu and it will be just fine! Hahah. But the laddus I made this year were a pleasant bite always, softer n happier.


           I have added a layer of flavor in the laddus, the beautiful flavor of the fennel seeds which are known as saunf or meeth saunf or mouri, goes so well with the flavor of the jaggery and the sesame seeds. The experience is so aromatic because of the presence of the fennel seeds. Now I will tell you the recipe so that you can make it in your kitchen.


For The Recipe: You will need
Sesame seeds- 250 gm
Jaggery/Gurr- 200 gm
Fennel seeds- 2 tsp
Salt- tiny pinch


1. First take a big wok or kadai or a big pan, it is easy to prepare this in a big wok rather in a small deep wok or pan, in a big wok it becomes easy to move around the mass of jaggery n sesame seeds. So take a big wok and add the sesame seeds and the jaggery and mix well with your hands until they are roughly distributed uniformly. Then put the heat on to medium flame, soon you will see that the jaggery has begun to melt under the heat. With a wooden spoon stir the mixture almost after every 30 seconds so that the jaggery never gets burned at the bottom of the wok. For this reason it is better to do it in a wok or pan with a thick base in which things don’t burn very easily.

2. Now after 5-8 minutes all the jaggery will melt completely, keep stirring every 30 seconds well and mix well everything, as the jaggery melts the whole mass will look more like a thick liquid, keep stirring and don’t move away from it for a minute, it burns quickly. However if it burns just a little bit its okay, don’t panic, it has happened with me to and it doesn't ruin the things until you have left for 2 whole minutes and it has burned quite a bit. So stay with it, don’t go anywhere, and don’t leave it alone for a minute.

3. Once the jaggery melts completely keep it on medium flame for 2-3 minutes, then put the flame to low and watch it n stir it every 30 seconds. At this time you will see the jaggery bubbling because it has melted, after about 5 minutes you will see the jaggery will thicken a bit but the bubbles will be slightly stronger in intensity and the mass will look a bit more liquid-ish in nature. As I said this will happen after 5 minutes once the jaggery has melted or roughly it will take  about 5 -8 minutes to get there depending on the temperature. Increase the heat to medium high at times stirring continuously for duration of 1 minute and then reduce it to low flame again. Just don’t keep the mass on high flame for more than a minute and if you are stirring very often you have very less chances of burning anything.

4. So 5-8 minutes after the jaggery has melted, the mass is bubbling and looks more liquid-ish than before, this is the stage when another transformation will take place, very soon the bubbles will reduce the whole mass of jaggery n sesame seeds will begin to thicken. So on a low or low to medium flame stir the mixture and watch it, after about 5-7 minutes the whole mass will thicken a bit more than before, it becomes a little difficult to stir it since it is thickening, at this stage add the fennel seeds and stir uniformly, add the tiny pinch of salt, stir and watch it. At this point take a teaspoon of the mass on a plate and when it cools slightly try to give it a round shape with your hands, see if you can do that easily or when you try to give it a round shape does it hold that shape or it feels quite soft when you try to give it a shape. Don’t forget to stir in-between, mostly when you will try to give it shape it will be a bit too soft to hold shape or just begin to hold shape, if it is too soft to hold shape give it 1 minute and try to do it again, if not there give it another minute until it comes to the stage when it just begins to hold shape.

5. Keep the heat always very low at this stage, so we will take little portions of the mass and test it like this until it just begins to hold shape, when the mass is at this stage we can still make laddus but they will be very soft, so we will give this mixture some more time-about 2-3 more minutes. So we will check again after 2 more minutes and see if now we can give it shape comfortably and it holds the shape or not. So we will give this another 1-2 minutes and when tested to give shape it will hold the shape properly. At this put the flame off and take the off the flame and pour the whole hot mass very carefully on big flat iron or steel plate.

6. Now it is time to face the heat! Take a bowl of water and wet your hands n pick up about a teaspoon of the hot mixture carefully in your hand and roll it between your palms to give it a spherical ball shape. The water is to protect your hand, after one has been done wet your hands again pick up another teaspoon of the mixture and make a ball out of it. it is advisable to work with one more person with you or 2 more persons with you doing the same, because as the mixture cools down slowly it becomes more hard so it becomes a little difficult when it is almost at room temperature, so having one more person with you will help making the laddus quickly before it gets to room temperature and also it will make the work faster. In case you are working alone and the mixture has got cold and you can’t make the laddus anymore, return the mixture in the wok and warm it slightly and pour it back in n start making the laddus again. But I will advise you to work with someone.

7. So now the laddus are done, try it, bite into it, it is hard but still breaks off easily under little pressure. As for cleaning the wok I will tell you the easiest way , pour some water in the wok, heat it, as the water heats up a bit with the wooden spoon make the hot water go all over the surface of the wok where it has got sticky and it will melt in no time. This is the easiest way to clean the wok with hot water, it is just jaggery that has caramelized and hardened when cold. So now the laddus are waiting, share the laddus with your loved ones and have the bite experience. Bon Appetit.


Sunday, October 12, 2014

Jalebi khane kaun aa rahen hein?

The spiral way to a sweet bite: Good old Jalebi/Jilipi/Jilawii/Zulbia


There is something about sweet crunchy things and then there is something about sweet sticky crunchy spiral things. That thing is Jalebi. Before the spiral jalebi twist your neurons let me tell you it is easy to make and you can have fun making jalebis! Yes jalebi is easy to make, well almost. A simple batter of plain flour and water fermented over some hours either with yeast or without yeast and then deep fried in oil and finally dipped into flavored sugar syrup-and then the world has jalebis.


              Well  I have fantastic  memories with jalebis, some of them take me back on my school life while some take me back on distant mornings when my dad would brings jalebis on his way back home from the local market and it was such a high moment for me being a kid. Not that jalebis don’t get me high now, they recently did when I made them for the first time in my life, so I was pretty excited that day.


                                                      Back to the time when I was in school, our school used to serve us snacks around the middle of the day, that was one unique thing about our school.  Some days they will serve us something savory while some days they will serve us something sweet like jalebis! Right inside the school premises and adjacent to the big green football field there was the complex where our mid-day snacks used to get prepared; there were series of rooms with men busy preparing food for all the students, which was a huge task. While kids from other school used to envy us for this we felt it was an asset. Even the school bunking kids would show up around the mid-day so they can get their snacks! Food is powerful ;)


                                                                                     Some days the great cooks from our school would surprise us by making jalebis! We used to call them Tiffin-man, in the Tiffin time all the students would queue up along the corridor of the complex, the students walking away collecting 3 jalebis in his hand, he was being watched . And to tell you our beloved Tiffin-man made big fantastic jalebis n not just jalebis they made everything made tasty for us. Thank you our Tiffin-man, for you all did a very good work.


                                                                                                 Do you know that jalebi is popular not just in India but equally in the neighboring countries of Bangladesh, Pakistan, Iran- in fact Jalebis are popular across the middle-east Asia, Northern and Eastern part of Africa. So if you haven’t tried it yet you know just what to do. In India Diwali is coming, just around the corner, on 23 rd October this year and Diwali and Jalebi are very good friends together. So I am thinking that on this Diwali if we want to give it a sweet personal touch and make it extra special you know what we should all do? Yes!!! Make jalebis at home, there is nothing quite like it huh!


The origin of the jalebis in India perhaps can be traced to the medieval time, during the time of the Persian invaders. In Iran jalebi is known as Zulbia, in fact a 10th century cookbook over there gives several zulbia recipes, in the 15th century India jalebi has names like ‘Kundlika’, ‘Jalavallika’.


                            So this makes me think the hands of the jalebi is pretty long, it has won hearts in so many countries , in Iran it is ‘Zulbia’, in India it is ‘Jalebi’/’Jilipi’/’jilapi’, in Egypt, Syria, Israel, Iraq, Lebanon it is ‘Zalabia’ /’Zalabiya’, in Bangladesh it is ‘Jilipi’, in Maldives it is ‘Zilebi’, in Nepal it is ‘Jeri’, in Algeria and Tunisia it is ‘Zlebia’ /’Zlabia’.


                                           Now since the shape of the jalebi is like spiral and overlapping and complicated it is even in metaphor like if someone who has a complicated heart or brain we sometimes that ‘Oh! Your heart is like a jalebi!’, and at times since our intestine is also twisted n a bit spiral so when someone is having a wicked idea secretly and sensing that we say ‘ummm... there are spirals in your stomach like the jalebis’.

Now I will simply give you the recipe. Fry on.

For The Recipe: You will need
For the Jalebi mixture
Plain flour/Maida- 1 cup
Water –around 3/4th cup
A pinch of baking soda
A pinch of salt
½-1 tsp of sugar

For the Sugar Syrup
Sugar – 1 cup
Water- 3/4th or 1 cup

For Deep-frying the jalebis
Vegetable oil or ghee- Around 3 -4 cups


Note:
1.When the fried jalebis are dipped in the sugar syrup make sure the syrup is slightly warm and not all cold.
           2. About the consistency of the batter, lift the batter in a spoon and it should fall slightly thickly off the spoon, not very easily and not like it has some difficulty falling off the spoon; it should fall freely but with some resistance.


1. Let’s begin by making the batter which will need 24 hours to ferment, so simply in big vessel take one cup of plain flour and add the sugar and then start adding the water little by little. Add a little water at first and whisk to make sure that there are no lumps; once you have done that add more water and whisk. The consistency will be not thin but not too dense, so if you take up the batter on a spoon and let it fall it should fall just freely and if you try to make some shape like 8 with the batter on the batter itself you should be able to do it and the figure should be visible for about 10 seconds. If you add more water nothing to worry, it can be adjusted by adding some more flour or if you have made a thicker one add a little more water. Once the batter is ready, cover it with a cling film and leave it for 24 hours and it will ferment and develop an unique flavor. Keep in mind after the fermentation the batter will go little lighter because of the air bubbles so we might have to add some more flour in case it has gone a bit more light than what we need, which happened in my case. So I simply added some more flour and let it rest for 30 minutes.

2.  So now after 24 hours our batter is ready, add the salt and a tiny pinch of baking soda or baking powder. Now we will make the sugar syrup, simple in a wok add the sugar and the water, turn on the heat to low and let the sugar melt completely, after that up the heat to medium and let the mixture simmer and it will need about 5-8 minutes to get to the stage when we drop some mixture in a plate and when slightly cooled we pick the drop between our 2 fingers it feels a bit sticky like honey, we are not looking for 1 or 2 string consistency, just when it gets like honey and not too watery, it’s ready. Take it off the heat.

3. Now we will fry the jalebis, in a wok or semi-flat deep pan add the oil and heat it up until the oil is moderately hot, we don’t want the oil to be very hot when frying or the jalebis will color immediately, so first heat the oil moderately and drop a little of the mixture with a spoon to the oil and look for they begin to bubble immediately but not gets colored or burnt immediately, it is happens the oil is too hot so remove it from the heat for a minute or in case the oil is too cold, and the little drops of batter in the oil take a bit of time to bubble heat the oil a little more.

4. Now take polythene cone or a piping bag with simple ½ cm hole nozzle or a squeeze bottle with a nozzle or a traditional Jalebi cloth with a stitched hole in it or just like what I did, I took a empty thin milk packet, open it up and put some of the batter in it and cut a little hole in one corner! So now the oil is hot, let’s start. Before you do your first jalebi spiral on the hot oil itself, do it several times on the batter, practice it. simply move your hand in a round shape as the batter falls and it will create a spiral and make 2 zigzag movements so the batter creates a straight line on the spiral itself, it will hold the spiral in shape, if we only do the spiral without the zigzag straight lines it won’t be able to hold its shape when we turn them over, so to hold it we need to connect the spiral with overlapping straight lines to hold their shape. So one jalebi is down in the oil, quickly move to a new surface in the oil to make another one and then another. Make 3-4 at a time. Now depending on the temperature of the oil the jalebis will take about 2 minutes on each side to get brown, don’t get them dark brown, once they get light brown turn them over and give 2 more minutes, take them out on a plate and them dip them in the sugar syrup for a about 2 minutes on each side, while they are in the sugar syrup start the new batch of jalebis in the oil.

5. You can make the jalebis light brown or dark brown both and they both have a different taste because they have been fried to a different level. Both are enjoyed so I suggest you to make both kinds, brown some of the jalebis a little to the dark brown stage on one side , then turn them over and do the same, while in next batch fry the jalebis as they just begin to color and turn them over and do the same to the other side. Keep the jalebis in the sugar syrup for total about 5 minutes, not more than that, about 2 minutes in each side and take them off. And when all of them are done, serve them.


Come on now! Crunch on, Happy Jalebis to you. Bon appétit. J